How to Invite Members and Set Permissions
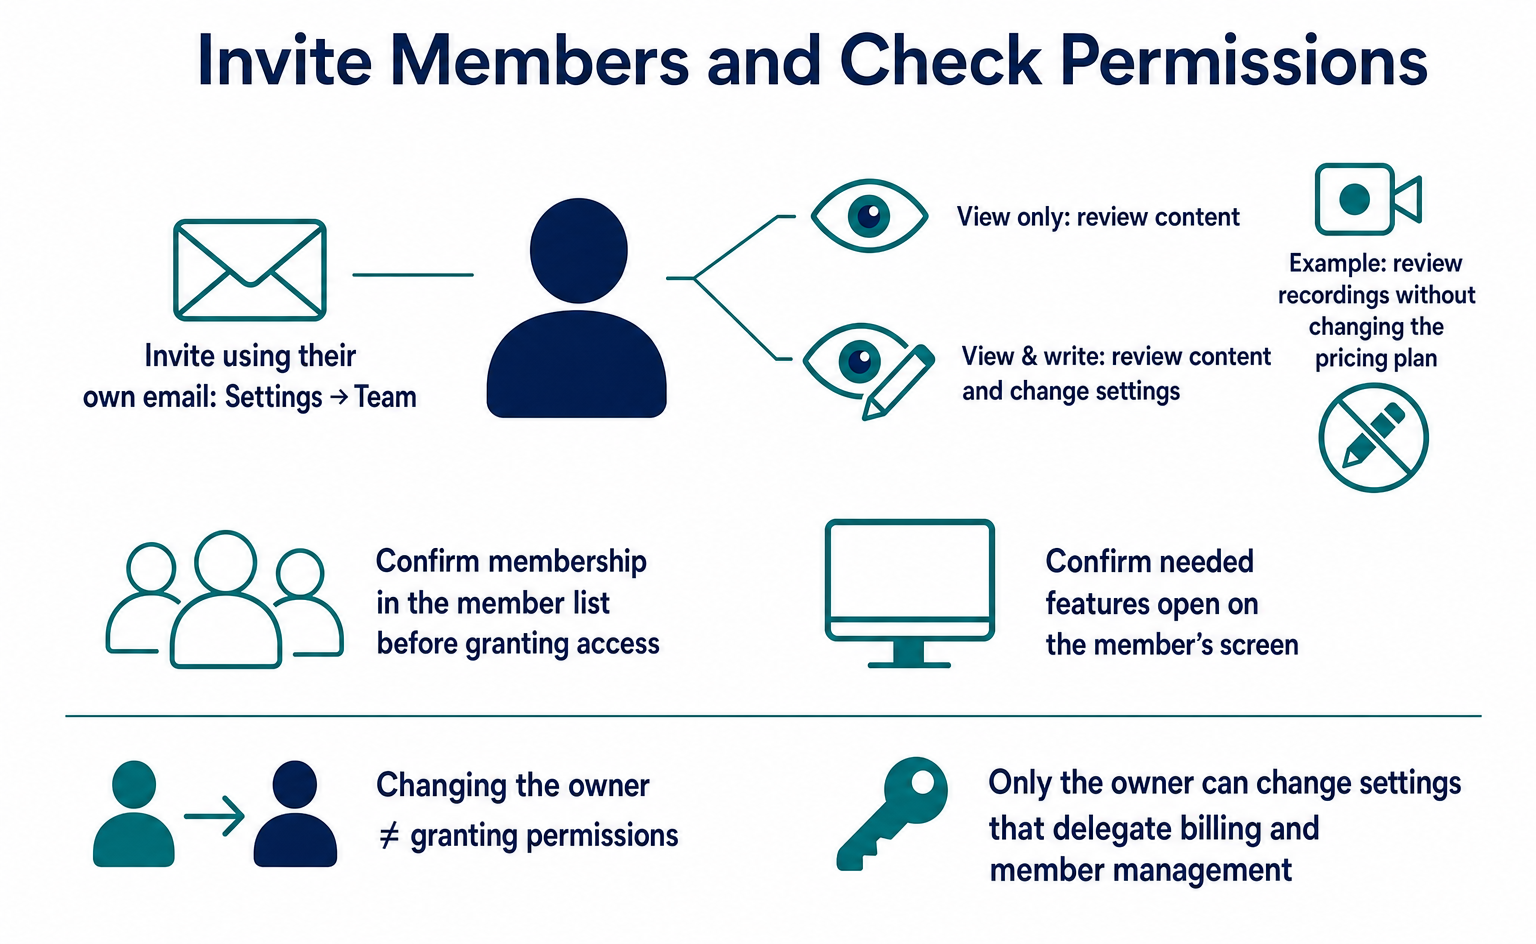
Invite members through Settings → Team using their login email addresses. Learn how to set view and edit permissions, share recordings with an agency, save changes, troubleshoot access, cancel invitations, remove members, and switch teams. Only owners can delegate billing and member management.
To add a member, send an invitation email from Settings (設定) → Team (チーム). After confirming that they have joined, give them access to the features they need. Choose View only (閲覧のみ) if they only need to review content, or View & write (閲覧・書き込み) if they also need to change settings.
“I want our web production agency to review recordings, but I don't want them to change our pricing plan.” You do not need to let them log in with your account. Invite them using their own email address and choose which features they can use.
Allow about 1 minute to send an invitation and 2 minutes to set permissions. This does not include the time the recipient needs to open the email and join. Before you start, confirm their login email address and the work you want them to handle.
“Permissions” determine which pages a person can view and what they can change. The “owner” manages the entire team. Only the owner can change the settings that delegate billing and member management.
1. The invitation and permission setup process
You can start working together once the person appears in the member list under Settings (設定) → Team (チーム) (/team) and can open the features they need. Sending the email alone does not confirm that they have joined or that their permissions are correct.
The example below shows 1 owner, 1 internal member, and 1 contact at a web production agency. The names and data are samples.
Try the interactive demo below. The article also explains each step in text.
Each member has settings for 6 permission groups. The internal member, tanaka, has View & write (閲覧・書き込み) access to AI Optimization (AI 最適化) and Web Recordings & Improvements (Web録画・改善). Billing (決済) and Member Management (メンバー管理) are set to No access (不可).
The agency contact, partner, has View only (閲覧のみ) access to AI Optimization and Web Recordings & Improvements. They cannot use Customer Service (接客) or Settings (設定). If their job is to review results and suggest improvements, check whether they need to make changes before granting write access.
What to check in the list
First, find the person's email address. Even if several contacts work for the same company, do not rely on the company name alone. Check the row for the person you invited. Then check the permissions for the features they will use.
Do not assume that an invitation means they can use everything they need. Ask them to open the relevant pages. If they will change settings, check that they can save changes, not just view the page. You do not need to change the actual pricing plan or unrelated settings to test this.
Before work starts, share the following details so the assignment is clear:
- The name of the team they will work in.
- The features they may view and the features they may change.
- The work you are assigning this time.
- Whom to contact if they need approval before changing settings.
- Whom to notify when the work is complete.
2. What to check before inviting someone
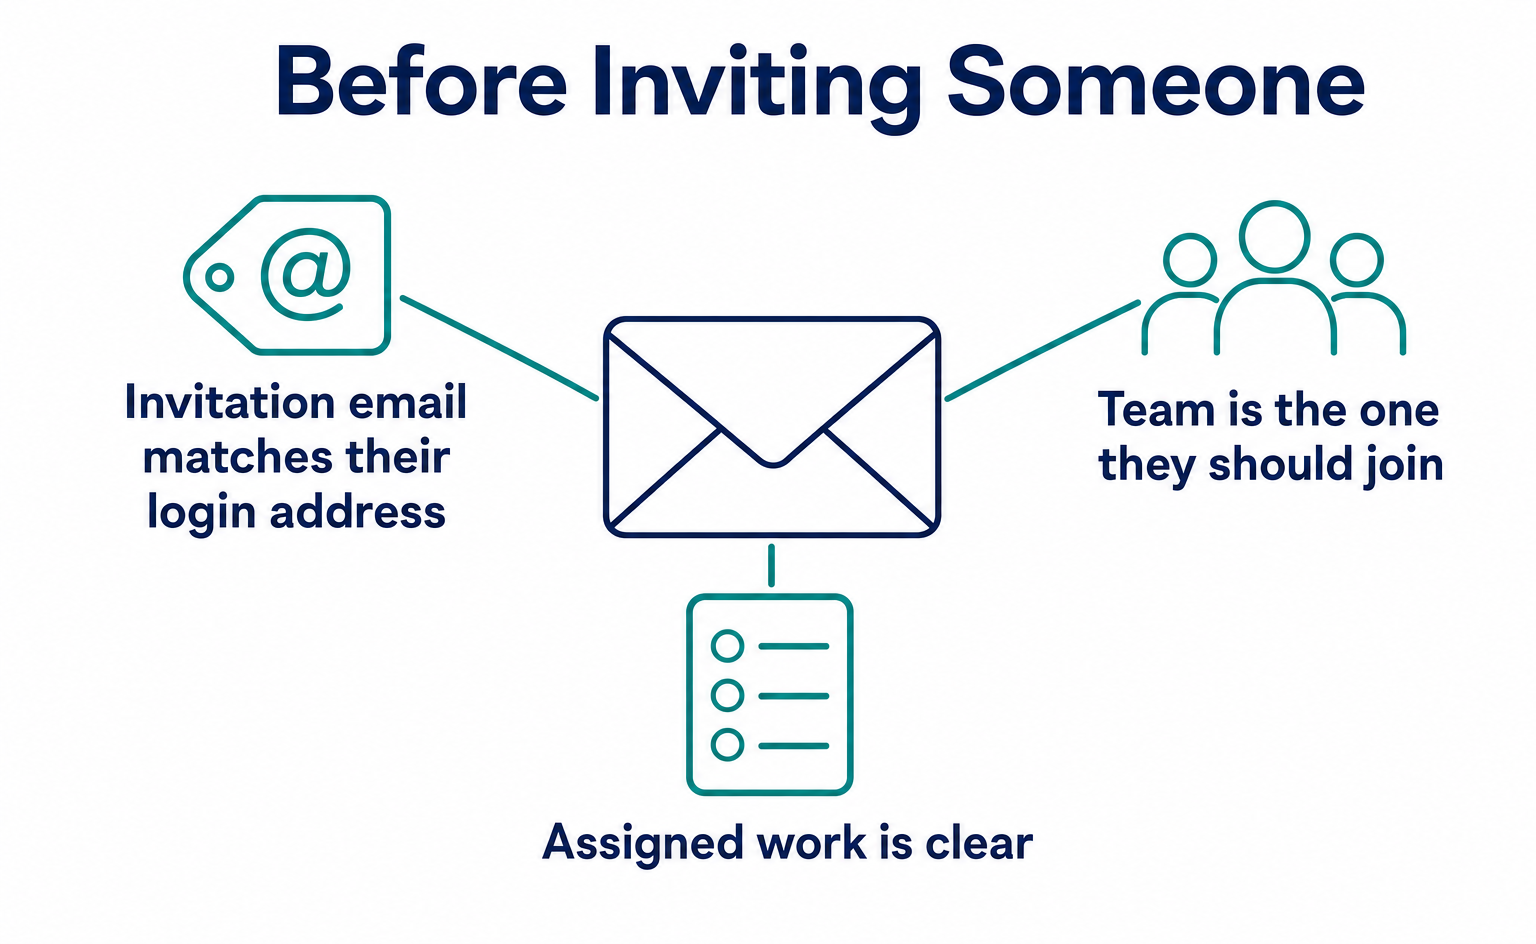
You can send an invitation if you have member management permission and know the recipient's login email address. They do not need to create an account first.
| Requirement | Details |
|---|---|
| Permission to invite | You must be the team owner or a member with member management permission. Newly joined members with view-only access cannot invite others. |
| The recipient's email address | It must match the address they use to log in to AgentSignal. For Google / Microsoft / Apple login, use the email address for that account. |
The address someone uses for everyday communication may differ from their login address. Ask, “Which email address will you use to log in to AgentSignal?”
The same rule applies when they log in with a Google, Microsoft, or Apple account: the email address must match the invitation. If they use both work and personal accounts, ask them to choose which one they will use before you invite them.
Checks for the person sending the invitation
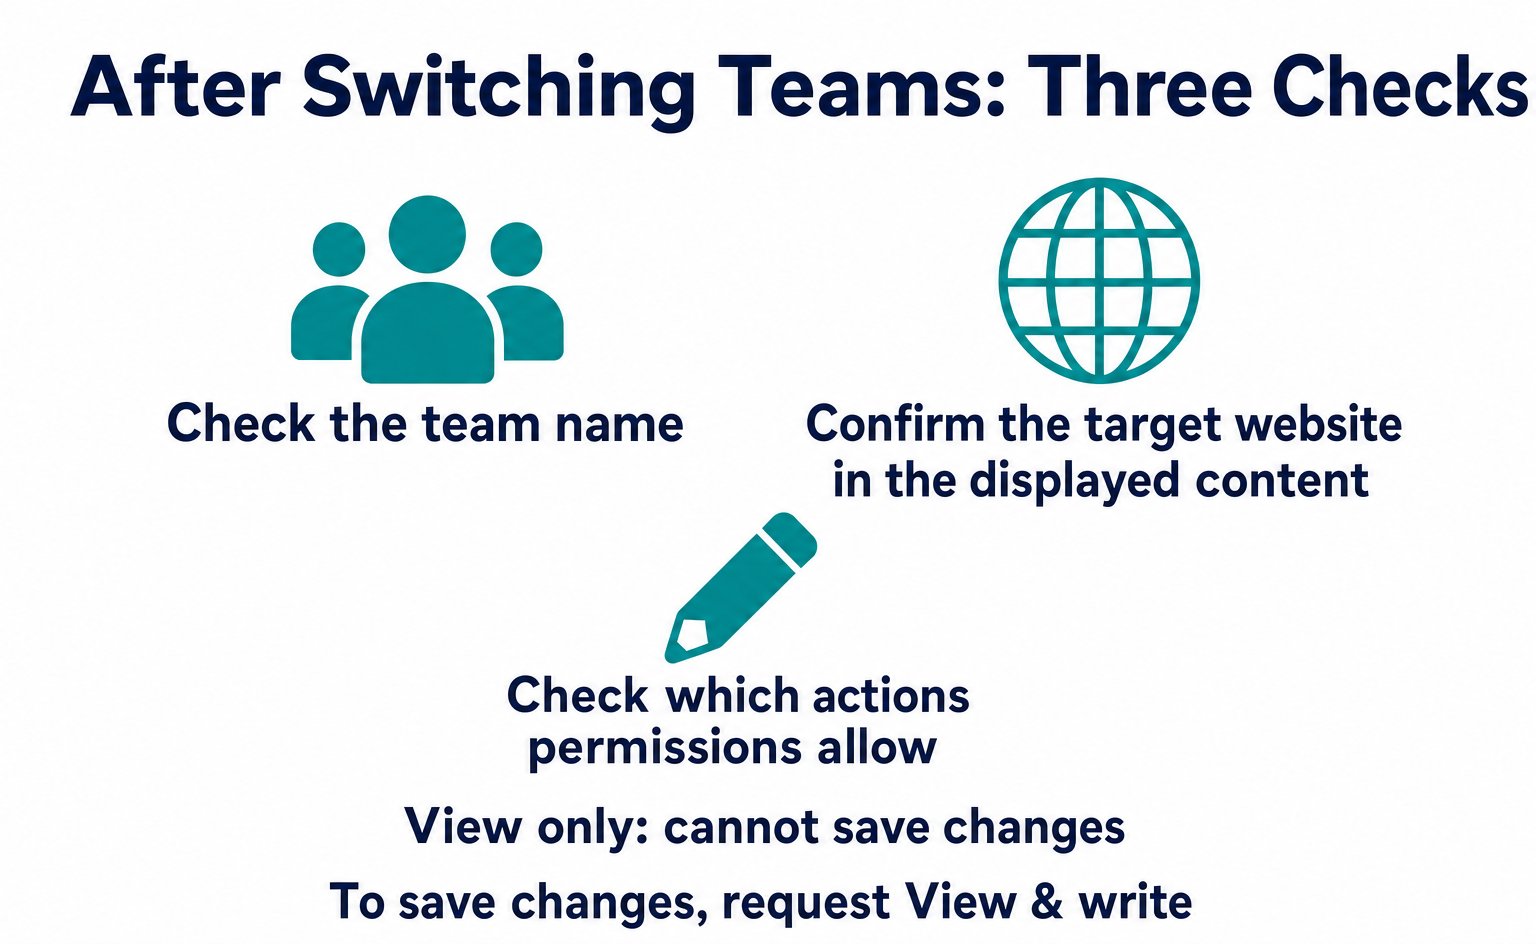
Check the team name at the top of the sidebar to make sure you are in the team the recipient should join. If you work with several clients, take care not to invite someone to another company's team.
Next, open Settings (設定) → Team (チーム). If you cannot find Invite member (メンバーを招待), ask the owner or someone responsible for member management. Permission to change other features does not necessarily let you invite people.
When asking someone else to send the invitation, provide both the email address and the intended work. For example, “Review recordings and suggest improvements” or “Add anticipated questions for AI Optimization.” This also makes it easier to choose permissions after the person joins.
Example message to send in advance
We will invite you to the AgentSignal team “[team name].” The invitation will go to “[login email address].” Please open the link in the email and log in with that address. Once you have joined, we will set up access to the features you need.
Replace the bracketed text with the actual details. You do not need to ask for their password. They log in with their own account.
3. Send the invitation email
Enter the email address under Invite member (メンバーを招待), then click Send invitation (招待を送る). The recipient can join the team by logging in with the same address the invitation was sent to.
- Open Settings (設定) → Team (チーム) in the left menu.
- Enter the recipient's email address under Invite member (メンバーを招待).
- Check the address, then click Send invitation (招待を送る).
- Ask the recipient to open the link in the invitation email.
- The recipient logs in with the invited email address. If they have not registered, they register with that address.
- Confirm that they have joined by checking the member list.
- If they need write access, change their permissions after they join.
Knowing the invitation link is not enough to join
Only the person logged in with the invited email address can join. Someone logged in with a different address cannot join even if they open the link.
The previous method, which allowed anyone with the link to join, has been discontinued. Instead of forwarding an email to bring in another contact, send a new invitation to that person's address.
For example, when a contact is replaced, do not reuse the previous contact's invitation email. Confirm the replacement's login address and invite them. Removing the previous contact, if they have already joined, is a separate action.
New members start with View only
Newly joined members do not receive permission to change settings. They start with permission to view pages. If an invited member cannot save settings, check whether the relevant feature should be set to View & write (閲覧・書き込み).
This prevents an invitation sent to the wrong person from immediately giving them the ability to change settings. However, view access still allows someone to see information. If you discover that you invited the wrong person, cancel the invitation before they join. If they have already joined, take action from the member list.
Where to check after sending
Invitations that have not yet been accepted appear under Sent invitations (送信済みの招待) on the same page. If the recipient cannot join, first check whether the email arrived, then whether their login address matches.
Sending an invitation and joining the team are separate actions. Do not report that someone has access based only on the sent invitation list. Check the member list and ask the recipient to confirm on their screen.
4. The difference between viewing, editing, and managing
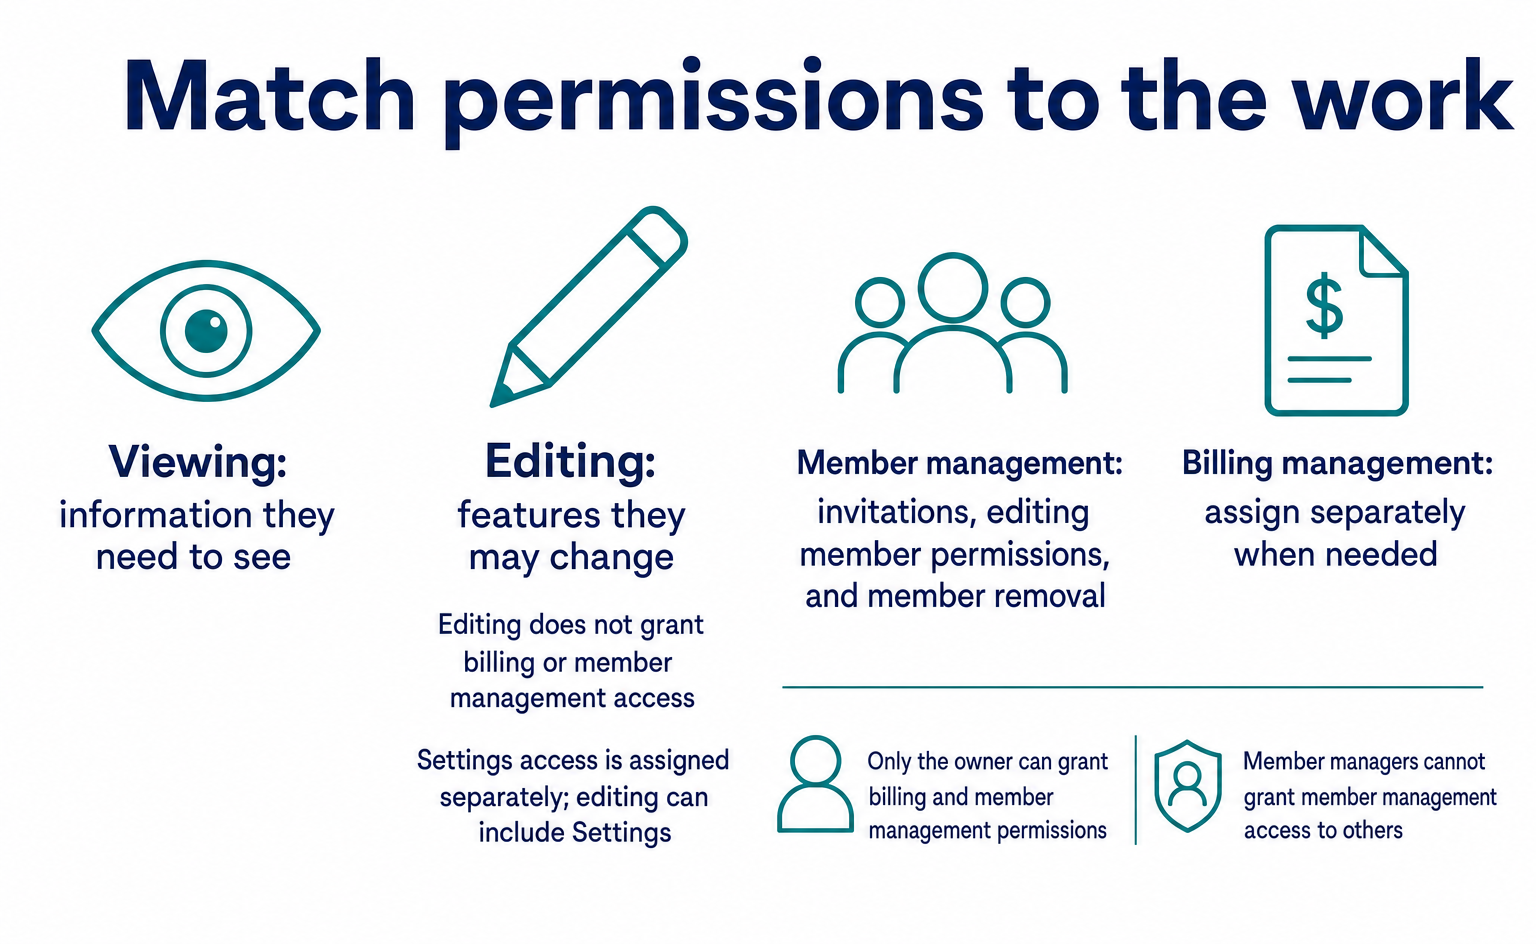
For each feature, you can choose whether a member may only view it or also make changes. There are 6 permission groups: 4 regular feature groups, plus Billing and Member Management.
| Group | Pages covered | Available levels | Who can grant access |
|---|---|---|---|
| AI Optimization (AI 最適化) | AI Citation Rate (AI 引用率) / AI Traffic (AI 流入) / URL Diagnosis (URL 診断) | No access (不可) / View only (閲覧のみ) / View & write (閲覧・書き込み) | Owner or someone with member management permission |
| Web Recordings & Improvements (Web録画・改善) | Web Recordings (Web録画) / Live Recordings (ライブ録画) / UI Improvements (UI改善) / Users (ユーザー) / CV / Custom Events (カスタムイベント) / Error Detection (エラー検知) | No access (不可) / View only (閲覧のみ) / View & write (閲覧・書き込み) | Same as above |
| Customer Service (接客) | Chat List (チャット一覧) / AI Bot Settings (AI ボット設定) / Chat Settings (チャット設定) | No access (不可) / View only (閲覧のみ) / View & write (閲覧・書き込み) | Same as above |
| Settings (設定) | Tracking Tag (計測タグ) / Privacy (プライバシー), etc. Only the owner can change the team name. | No access (不可) / View only (閲覧のみ) / View & write (閲覧・書き込み) | Same as above |
| Billing (決済) | Subscribing to or changing paid plans | No access (不可) / Can manage (管理可) | Owner only |
| Member Management (メンバー管理) | Invitations, permission editing, and member removal | No access (不可) / Can manage (管理可) | Owner only |
If someone will handle AI Optimization, check the AI Optimization permissions. If they need to review recordings, check Web Recordings & Improvements. Choosing the group based on the work avoids allowing changes to unrelated settings.
UI Improvements, CV, and Custom Events in the table are actual menu names. CV refers to an action registered as a conversion, such as submitting an application. Rather than enabling every item, including unfamiliar ones, confirm which pages the person needs to open.
Regular features use No access (不可), View only (閲覧のみ), and View & write (閲覧・書き込み). Billing and Member Management offer Can manage (管理可). There are 4 labels in total, but not every group offers all of them.
| Level | What it allows | What it does not allow |
|---|---|---|
| No access (不可) | The feature's menu cannot be opened | Any viewing |
| View only (閲覧のみ) | Opening pages, viewing data, and playing recordings | Changing or saving settings, adding anticipated questions, or changing chat settings |
| View & write (閲覧・書き込み) | Viewing, plus changing settings and adding entries within that feature group | Billing, member invitations, and permission editing, which are separate groups |
| Can manage (管理可), for Billing / Member Management only | Subscribing to or changing paid plans / inviting members, editing permissions, and removing members | — |
If a manager only needs to review results, check whether View only is sufficient. If someone will add anticipated questions or save settings, give them View & write access for that group.
Check Billing and Member Management separately
Can manage (管理可) for Billing covers subscribing to and changing paid plans. Can manage for Member Management covers invitations, permission editing, and member removal. These are separate from write access to regular features.
Only the owner can grant these 2 management permissions. Someone entrusted with member management cannot pass the same management permission on to another person. The owner decides whether to add more people with management access.
An invitation to review recordings does not require billing or member management access. Decide separately whether each permission is needed for the person's work.
Owner permissions
The owner has permission to manage the entire team. You cannot set the owner's permissions to No access (不可) from the member permission editing screen.
Before editing, check the person's name and email address. If you need to change the owner, reassigning ordinary feature permissions will not do this. Contact support through Ask AI (AI に質問) in the header, including the team name and the current owner's email address.
5. Permission examples based on the work
Choose permissions based on the work a person will do, not just their job title. The table below offers starting points. Check them against each person's actual responsibilities.
| Role | AI Optimization (AI 最適化) | Web Recordings & Improvements (Web録画・改善) | Customer Service (接客) | Settings (設定) | Billing (決済) | Member Management (メンバー管理) |
|---|---|---|---|---|---|---|
| Owner (contract holder) | View & write (閲覧・書き込み) | View & write (閲覧・書き込み) | View & write (閲覧・書き込み) | View & write (閲覧・書き込み) | Can manage (管理可) | Can manage (管理可) |
| Internal marketer | View & write (閲覧・書き込み) | View & write (閲覧・書き込み) | View & write (閲覧・書き込み) | View only (閲覧のみ) | No access (不可) | No access (不可) |
| Internal web specialist who works with tags | View only (閲覧のみ) | View & write (閲覧・書き込み) | No access (不可) | View & write (閲覧・書き込み) | No access (不可) | No access (不可) |
| Web production agency asked to suggest improvements | View only (閲覧のみ) | View only (閲覧のみ) | No access (不可) | No access (不可) | No access (不可) | No access (不可) |
| Agency handling AI Optimization operations | View & write (閲覧・書き込み) | View only (閲覧のみ) | No access (不可) | No access (不可) | No access (不可) | No access (不可) |
| Customer service staff handling chats | No access (不可) | No access (不可) | View & write (閲覧・書き込み) | No access (不可) | No access (不可) | No access (不可) |
| Accounting | No access (不可) | No access (不可) | No access (不可) | No access (不可) | No access (不可); the owner checks billing | No access (不可) |
| Manager or executive who only reviews information | View only (閲覧のみ) | View only (閲覧のみ) | View only (閲覧のみ) | No access (不可) | No access (不可) | No access (不可) |
If a web production agency only needs to review recordings and suggest improvements, View only allows it to play recordings and view heatmaps. A heatmap uses colors to show information such as frequently clicked areas.
If an agency will handle AI Optimization operations, including adding anticipated questions, set AI Optimization to View & write. If it later needs other features, confirm the work before adding access.
Example: Share only recordings
Set Web Recordings & Improvements (Web録画・改善) to View only (閲覧のみ). Set AI Optimization (AI 最適化), Customer Service (接客), and Settings (設定) to No access (不可) if they are not needed for this assignment. Do not grant billing or member management access either.
Separately tell the recipient which pages and time period to review in the recordings. Permissions determine which features someone can use. They do not communicate what you want the person to investigate.
If the recipient asks to see another page, ask for its name and why they need it. Rather than broadening every permission when a problem arises, check what the additional work requires.
Example: Delegate chat handling
Set Customer Service (接客) to View & write (閲覧・書き込み). Check separately whether the same person will also handle recordings or AI Optimization. Assigning chat work does not require allowing changes to all other features.
Before work starts, share the chat configuration and the person's responsibilities. If they cannot save settings, check their Customer Service permission. Changing a different group will not give them more access to that page.
Example: Share billing details with accounting
The table shows an arrangement in which the owner checks billing and shares invoices or receipts with accounting. Consider whether someone who only needs to review billing details should also be able to change the contract.
If you actually delegate billing management, the owner grants Can manage (管理可) for Billing (決済). Make sure people within the company also know who will make contract changes.
6. Change a member's permissions
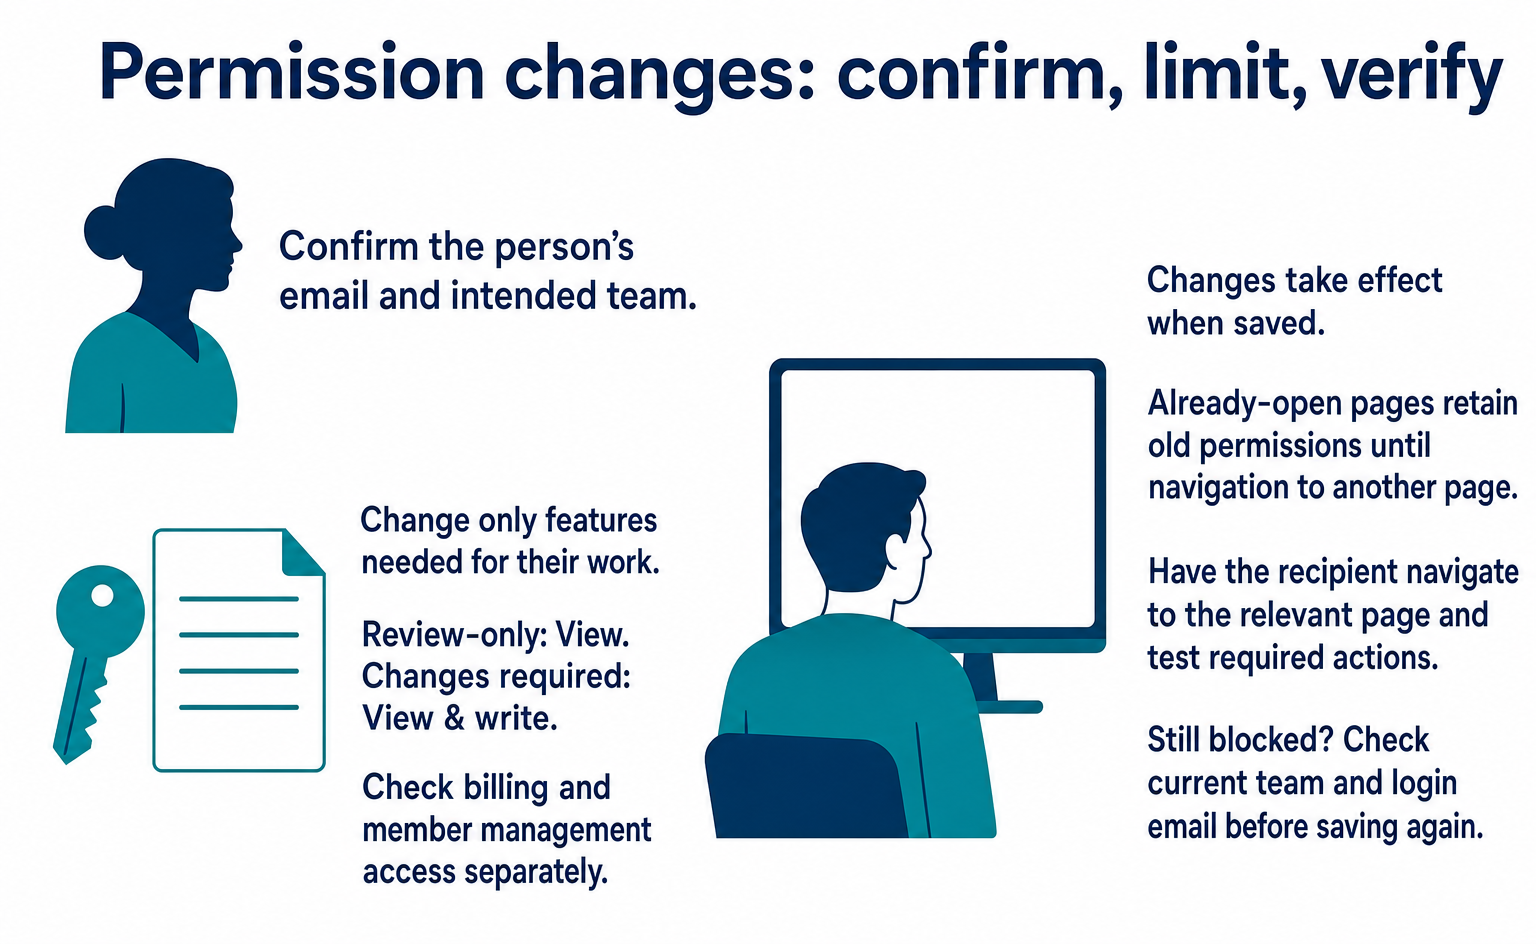
Open Edit permissions (権限を編集) in the member's row, choose the settings, and save. Selecting settings alone does not complete the change.
- Open Settings (設定) → Team (チーム).
- Check the person's email address in the member list.
- Click Edit permissions (権限を編集), the pencil icon in the permissions area.
- Select the setting for each group. Normally, values are display-only and cannot be changed until you open editing.
- If Can manage (管理可) is needed for Billing (決済) or Member Management (メンバー管理), the owner sets it.
- Review the changes and click Save (保存) at the far right.
- Confirm that Permissions updated (権限を更新しました) appears.
To stop without making changes, click Cancel (キャンセル). If you opened the wrong member's row, cancel rather than saving, then select the correct person.
The new settings take effect when you save. If the recipient already has a page open, the new permissions apply the next time they navigate to another page. Check that they are not continuing to look only at the old page after the change.
Checks before saving
- The person's email address is correct.
- You are changing permissions in the correct team.
- You have not granted write access for review-only work.
- Features that require changes are set to View & write (閲覧・書き込み).
- You have separately checked the need for billing and member management access.
After saving, ask the recipient to open the relevant page. Rather than simply saying, “I've granted permission,” name the page to check: “Can you open Web Recordings (Web録画)?”
If they still cannot perform the action, check their current team and login email before repeatedly saving the same settings. If they are using a different team or account, changing the intended member's permissions will not solve the problem.
7. Cancel an invitation or remove a member
Cancel the invitation if the person has not joined. If they have joined, remove them from the member list. In either case, first check whether they have already joined.
| Goal | Location | Action | Effect |
|---|---|---|---|
| Invalidate an invitation for someone who has not joined | Settings (設定) → Team (チーム) → Sent invitations (送信済みの招待) | Cancel invitation (取り消す) | The link in that invitation email stops working. Inviting them again sends a new email. |
| Remove a member who has joined | Settings (設定) → Team (チーム) → Member list (メンバー一覧) | Delete (削除) → OK in the confirmation dialog | The person can no longer open the team's pages. Data they created, such as projects and settings, stays in the team. |
| Temporarily block access | Member list (メンバー一覧) → Edit permissions (権限を編集) | Set each group to No access (不可) | Blocks access without removing the member. Restore permissions when work resumes. |
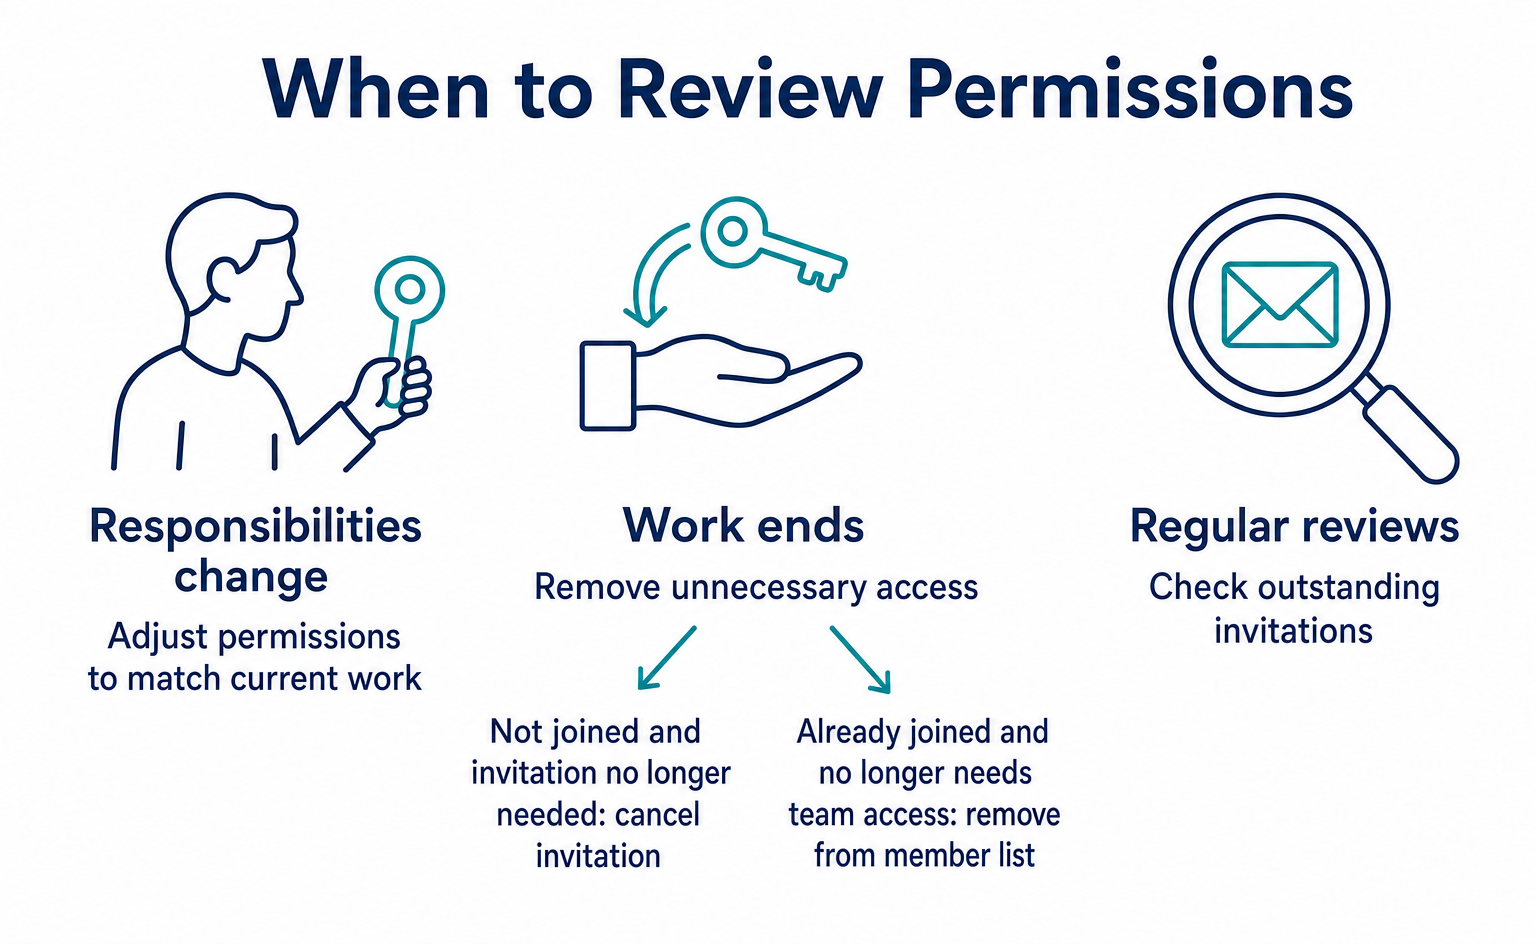
Consider removing a contact whose contract has ended and who no longer plans to use the team. To pause access temporarily, you can instead set the relevant groups to No access (不可).
If the person has not joined
Under Sent invitations (送信済みの招待) in Settings (設定) → Team (チーム), check the email address and click Cancel invitation (取り消す). The link in that invitation email will no longer work.
If you entered the wrong address, cancel the old invitation and send a new one to the correct address. Ask the recipient to open the new email. Check the email address to confirm which invitation you canceled.
If the person has already joined
Find the person's row in the member list. Click Delete (削除), review the confirmation dialog, and select OK.
This removes only the person's membership in the team. Recordings, AI Optimization projects, chat settings, and other data they created remain in the team. You do not need to recreate the same data for a handover.
To have the person join again, send a new invitation. They will start with View only (閲覧のみ), so review the required permissions again even if they will resume the same work.
Checks when a contact changes
Record removal of the outgoing contact and invitation of the replacement as separate tasks. The outgoing contact is not automatically removed when the replacement joins.
Tell the incoming person the team name, the features they will handle, and the work in progress. Existing data remains in the team, but that does not determine who will do the next task. Assign responsibility as well.
8. Switch teams
Use the team name at the top of the sidebar to switch between teams you belong to. Permissions are separate for each team, so the features available to the same person may differ.
Contacts at web production agencies or other agencies may belong to several clients' teams. Click the team name to see the list of teams you belong to. Selecting a team displays “Switched to [team name] (〜に切り替えました).”
A person can have View & write (閲覧・書き込み) access at Company A and View only (閲覧のみ) access at Company B. If they could save a moment ago but cannot now, first check the team name. The earlier action may have been in a different team.
Check the team first, especially before invitations and tag creation
Before sending an invitation, make sure you have opened the team the recipient should join. Check not just the client name but also the team name in the work request.
Tracking tags are also separate for each team. A tracking tag is a short piece of code placed on a website to record visits and actions. If you place Company B's team tag on Company A's website, Company A's visits will be recorded in Company B's team.
Check the team name and target website before copying the tag and again before passing it to the person who will install it. See Install a tracking tag for installation instructions.
Include the team name when asking for help
A message saying only “I cannot open the page” does not identify which team's settings need checking. Ask for the team name, the page they want to open, and the message displayed.
If they can perform the action in another team, check that information too. Settings differ by team even with the same login. You do not need to broaden permissions across all teams.
9. When someone cannot join or save changes
Start by checking the email address, team name, and permission for the feature they want to use. Knowing where they are stuck helps narrow down which settings to investigate.
| Symptom | Cause | What to do |
|---|---|---|
| Cannot join after opening the invitation link | Logged in with a different email address from the invitation | Log in again with the invited address. For Google / Microsoft login, check that account's email address. |
| Joined, but very few menu items appear | The relevant features may be set to No access (不可) | The inviter checks the relevant features under Settings (設定) → Team (チーム). |
| Can open a page but cannot click Save (保存) | That group is set to View only (閲覧のみ) | Ask for it to be changed to View & write (閲覧・書き込み). |
| Cannot subscribe on the paid plan page | Does not have Can manage (管理可) for Billing (決済) | Ask the owner to subscribe. Only the owner can grant billing management permission. |
| No button for inviting members | Does not have Can manage (管理可) for Member Management (メンバー管理) | Ask the owner to send the invitation. |
| Cannot perform an action that worked yesterday | May be in another team, or permissions may have changed | Check the team name at the top of the sidebar and switch teams. |
| Invitation email has not arrived | It may be in spam, or the address may contain a typo | Check spam. If it is not there, cancel the invitation under Sent invitations (送信済みの招待) and resend it. |
Even if a symptom matches the table, check the actual screen rather than assuming the cause. In particular, if an action worked yesterday, check both the team selection and permission changes.
If the invitation email has not arrived
First, ask the recipient to check spam. Then the inviter should review the address under Sent invitations (送信済みの招待). If it contains an error, cancel the invitation and resend it to the correct address.
Also ask whether the recipient is checking a different inbox. If you sent the invitation to their login address rather than their usual contact address, tell them where to look.
If the email arrived but the recipient cannot join
Check the email address they are logged in with. If they use Google or Microsoft login, check whether they selected a different account in the browser.
Also check Sent invitations (送信済みの招待) to make sure the invitation has not been canceled. If needed, send a new invitation and ask the recipient to use the link in the new email.
If the page opens but changes cannot be saved
Check whether the feature is set to View only (閲覧のみ). If the person should make changes, the owner or someone responsible for member management sets it to View & write (閲覧・書き込み).
After the change, ask the recipient to navigate to the relevant page again. If they still cannot save, check the team they have open, the page name, and the message displayed.
If you cannot resolve the issue
Use Ask AI (AI に質問) in the header and provide the following information. No password is needed.
Team name: The relevant team name
Member: The email address invited
Intended action: For example, opening recordings or saving settings
Where the issue occurs: The page name and displayed message
Checks completed: For example, confirming that the invitation and login email addresses match
Instead of simply forwarding the recipient's message, include what you have already checked. This helps avoid repeating the same checks.
10. Review permissions that are no longer needed
Start with only the permissions a person needs for the assigned work. Add access when the scope grows, and review it when the work ends.
This approach is called “least privilege.” NIST SP 800-53 lists it as principle AC-6 [3]. In everyday work, think of it as allowing only the pages and changes needed for the job.
| Principle | How AgentSignal implements it |
|---|---|
| Verify identity before allowing entry | Only someone logged in with the address the invitation was sent to can join. The shared-URL method has been discontinued. |
| Start with least privilege | New members have view-only access. Write access is added later. |
| Limit who can grant permissions | Only the owner can grant management access for Billing and Member Management, preventing a chain of delegated management permissions. |
| Make changes explicit | Permission changes take 2 steps: pencil → Save (保存). Values are display-only by default to prevent accidental changes. |
Google Workspace administrator roles [4] and GitHub organization roles [5] also divide access according to responsibilities. You can apply the same approach even if you have not used those services.
Invite people individually instead of sharing accounts
When several people share an account, it becomes difficult to remove only one person's access when responsibilities change. Inviting each person with their own email address lets you check their membership in the member list.
Do not treat view-only work as a reason to share an account. Use each person's own account for review work too. Choose which recordings and settings they can view, and make it possible to review access when the work ends.
Review access when the work changes
If an agency's assignment expands from reviewing recordings to changing settings, check which groups it needs. Conversely, if ongoing operations have ended and the agency only needs to review reports, reconsider whether write access is still necessary.
Also check whether contacts whose contracts have ended remain in the team. Define an offboarding process as well as an invitation process so it is clear who will remove them.
Explain why permissions are set that way
Simply saying “It is set to No access” makes it hard for the recipient to know whether they can do their job. Explain, “For this assignment, we need you to review recordings, so you can view only Web Recordings & Improvements (Web録画・改善).”
If a needed page is unavailable, ask the recipient to send its name and purpose. You can then decide whether to add permission based on the assignment.
Summary
Confirm the invited email address and set access to the required features after the person joins. This lets you work together without sharing an account. Finally, confirm that they can open the pages they need.
- Send invitations from Settings (設定) → Team (チーム). Only the person logged in with the invited email address can join.
- New members start with View only (閲覧のみ). Set View & write (閲覧・書き込み) only for features they need to change.
- Only the owner can grant Can manage (管理可) for Billing (決済) and Member Management (メンバー管理).
- Before saving, check the person's email address, team name, and the features being changed.
- Cancel the invitation if the person has not joined. If they have joined, remove them from the member list. Data already created remains in the team after a member is removed.
- If an action is unavailable, check the email address, team name, and feature permission in that order.
FAQ
- Q. If I forward an invitation link to someone else, can they join?
- Only someone logged in with the invited email address can join. Someone logged in with a different email address cannot join through a forwarded link.
- Q. I sent an invitation, but the recipient says they cannot join.
- Check that their login email address matches the invited address. This also applies to Google and Microsoft login. Then check Sent invitations (送信済みの招待) on the Team (チーム) page to make sure the invitation has not been canceled.
- Q. A member has joined but cannot open a page because they lack permission.
- On the Team (チーム) page, check whether the member can view that feature. New members start with view-only access and cannot edit. The owner grants billing and member management permissions.
- Q. Can I hide other features and let a web production agency view only recordings?
- Yes. Set Web Recordings & Improvements (Web録画・改善) to View only (閲覧のみ), and AI Optimization (AI 最適化), Customer Service (接客), and Settings (設定) to No access (不可). Leave billing and member management disabled too, so the agency cannot open features it does not need for the assignment.
- Q. What is the difference between View only and View & write?
- View only (閲覧のみ) lets a member review content. View & write (閲覧・書き込み) also lets them save settings, add questions, and make other changes within that feature. Choose View only for review-only assignments.
- Q. Can I make someone else the owner?
- You cannot change the owner through ordinary member permission editing. Giving someone billing or member management permission does not make them the owner. If the person in charge changes, first confirm the required handover process.
- Q. Does removing a member also delete the data they created?
- The team's data remains. Only that person's membership in the team is removed. Recordings, AI Optimization projects, chat settings, and other data are not deleted.
- Q. Can one person belong to multiple teams?
- Yes. Switch teams using the team name at the top left of the screen. Permissions are separate for each team. Someone may be the owner of one team but have only view access in another.
Sources
- [1] AgentSignal 使い方ガイド (チーム・権限管理) (AgentSignal) — accessed 2026-09
- [2] AgentSignal 使い方ガイド (計測タグの設置) (AgentSignal) — accessed 2026-09
- [3] NIST SP 800-53 Rev. 5 — AC-6 Least Privilege (NIST) — accessed 2026-09
- [4] Pre-built administrator roles (Google Workspace Admin Help) — accessed 2026-09
- [5] Roles in organizations (GitHub Docs) — accessed 2026-09
About the author
Shogo MizushimaCEO of kairos Inc. / AgentSignal Developer
Develops AgentSignal, a tool for measuring AI crawler visits and AI-referred traffic, and diagnosing AIO readiness. Writes about measurement and practical improvements for AI search using observed data.
Related articles

AIO and AI search
What Is AIO? Its Two Meanings and Where to Start with AI Optimization
AIO has two meanings: work to get your company featured in AI answers, and Google Search’s AI Overviews. Learn how it relates to SEO, what to confirm in a proposal, what Search Console and Bing reports show, and your first tasks.
Published

AIO and AI search
What Is LLMO? How It Differs from SEO and Why Some Say It Is Pointless
LLMO is the work of helping answers from ChatGPT and other AI find and accurately describe your company. Learn how it differs from SEO, why some call it pointless, how E-E-A-T relates, how to measure results and what to do in the first month.
Published

Measurement and site improvement
What Are AI Crawlers? Why Blocking GPTBot Doesn’t Remove You from ChatGPT Search
AI crawlers are programs AI companies use to read public web pages. Learn how GPTBot differs from OAI-SearchBot, how Google-Extended works, why visits can continue after a robots.txt block and how to choose settings by purpose.
Published