How to Install the Tracking Tag and Check Visits and Recordings
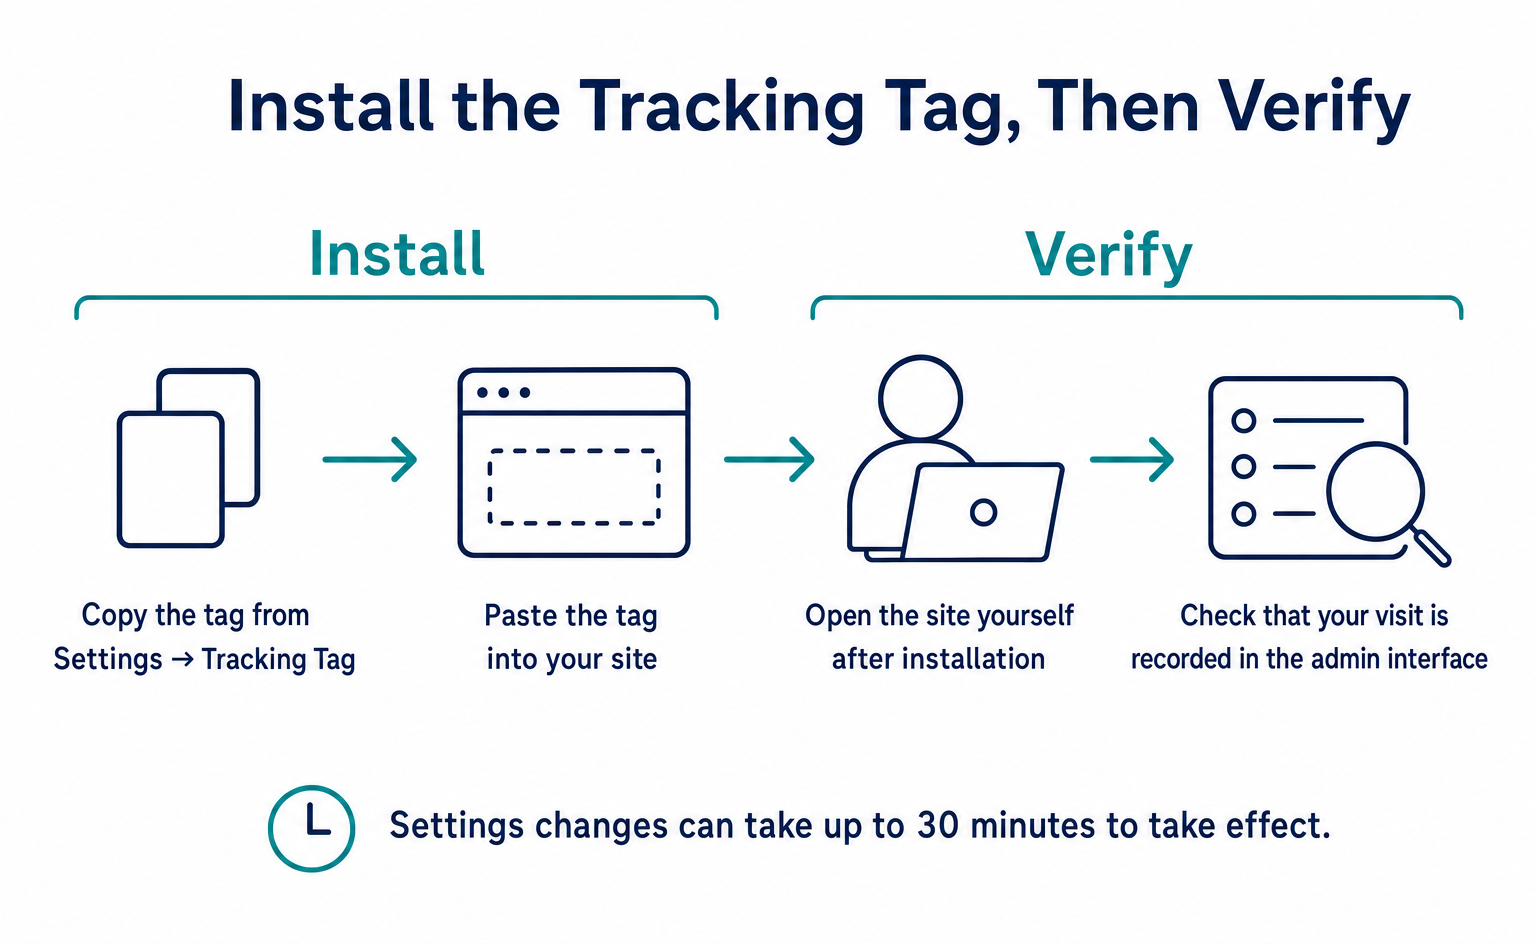
Copy the tracking tag from Settings, install it on your site, and check that your visit appears. Learn where to place it in WordPress or GTM, what to send your developer, how to troubleshoot recordings, and how to mask private information and track conversions.
The tracking tag is a short piece of code that records site visits and on-screen actions. Copy it from Settings (設定) → Tracking Tag (計測タグ) and install it on the site you want to measure. Then open the site yourself and check that the visit is recorded in the admin interface.[1] Installation takes about 5 minutes.
Perhaps you have just signed up and your dashboard is still empty. You see a message asking you to install a tag, but do not know where to start. Begin by copying the installation code. If someone else edits your site, you can send them the code and the target URL and ask them to install it.
The screen examples below use sample data. Your own admin interface will show actual visits to your site. Treat placing the code and checking that visits are recorded as two separate tasks.
1. What can you learn after installing the tag?
Once a visit is recorded after installation, the dashboard shows summaries and a list of visits. Pasting the code does not add past visits retroactively. Open the site after installation to check it.
If tracking has not started, a banner on the dashboard and Web Recordings (Web録画) explains how to install the tag. The installation code shown there is the same code you can copy from Settings (設定) → Tracking Tag (計測タグ).
Try the interactive demo below. The article also explains each step in text.
Once visits are recorded, the top section shows totals for the past 7 days. Agent Share (エージェント比率) is the proportion of visits classified as AI carrying out tasks requested by people. When comparing this with visit counts in GA4, distinguish what each number classifies.
Try the interactive demo below. The article also explains each step in text.
In addition to checking the 4 summary cards, find the visit to the page you opened for testing. The presence of cards alone does not confirm that tracking works on every page you just added. Check the target URLs too. Sections 2–5 walk through installation and verification.
2. Prepare before installation
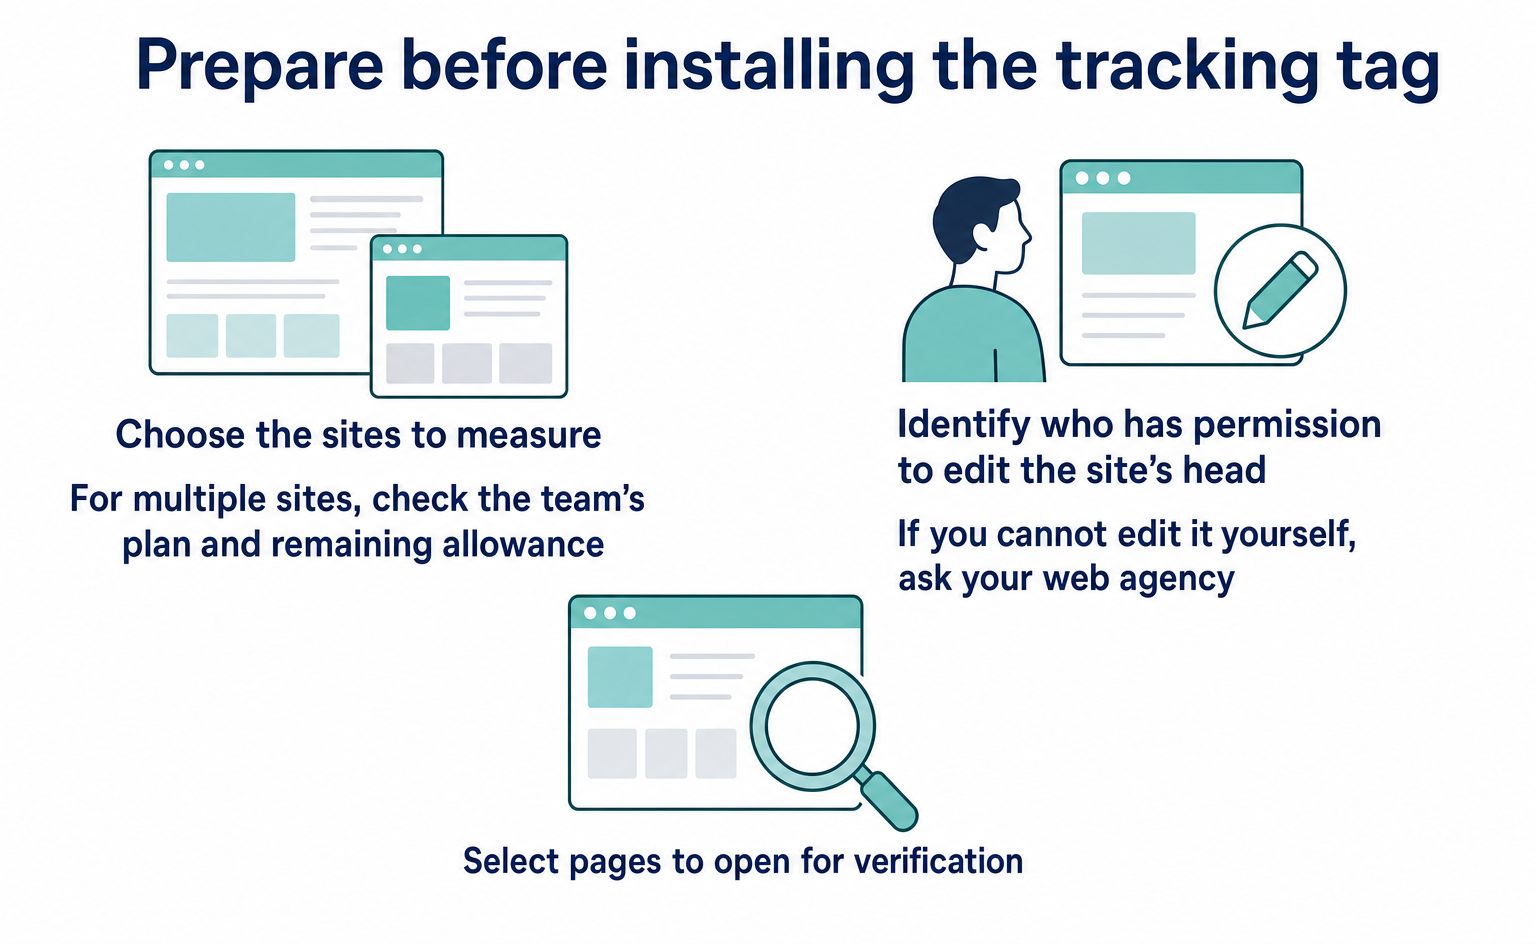
Have your account, permission to edit the site, and time to test ready. If you cannot edit the site yourself, decide in advance who will install the tag and who will check it.
| What you need | Details |
|---|---|
| An AgentSignal account and team | You can start on the free plan. Check that you can open the team's settings menu. |
Permission to edit the site's <head> |
In WordPress, use the theme's header.php or an SEO plugin's Insert Code into head (head にコードを挿入) field. In Shopify, use theme.liquid. If you cannot edit it yourself, ask your web agency to add one line to the head. Section 4 includes a request template. |
| 5 minutes | 1 minute to get the tag, 2 minutes to paste it, and 2 minutes to check it. |
You do not need a credit card to get the tag. Installing it alone does not trigger a charge. The free plan allows a lifetime total of 1,000 tracked visits, while paid plans have monthly limits. Every plan allows unlimited registered domains. A domain is the name used in a site's address.
Your plan determines how long recordings are kept and how much recording allowance you have. If you measure multiple sites under one team, check that team's plan and remaining allowance.
3. Copy the tag
Open Settings (設定) → Tracking Tag (計測タグ) (/settings/tag) and click Copy Tag (タグをコピー). The code shown belongs to the team you currently have open. If you belong to multiple teams, check the team name at the top of the sidebar before copying.
- Log in to AgentSignal and open Settings (設定) → Tracking Tag (計測タグ) in the left menu. You can also open it from Show Tracking Tag (計測タグを表示) at the bottom of the dashboard.
- The card below appears. Click Copy Tag (タグをコピー) at the top right to copy the entire snippet to your clipboard.
Try the interactive demo below. The article also explains each step in text.
The following example shows the code's structure. Use the actual code copied from your admin interface. The value after k= is the tracking key, which specifies which team receives the records.
<script async src="https://agent-signal.ai/t.js?k=チームごとの計測キー"></script>
Before moving on, understand whether you need different code for each site and how to handle the tracking key.
You can use the same tag on all sites measured by the same team. You do not need to generate separate tags for Site A and Site B. Install the same code on each site, and each site will be registered automatically when it receives a visit.
For example, if one team needs to check both your main site and your recruitment site, install the tag on both. Installing it on the main site does not automatically add it to a separately built recruitment site. Make a list of the target URLs in advance.
The tracking key is not a password for the admin interface. It appears in the code of public pages. Knowing the key does not allow someone to log in to the admin interface.
However, even a one-character mistake in the key can prevent tracking from starting. Records may simply not appear, with no error message. Copy the key rather than typing it. When sending the code to your web agency, send the full code, not an abbreviated version.
4. Where to place the tag on your site
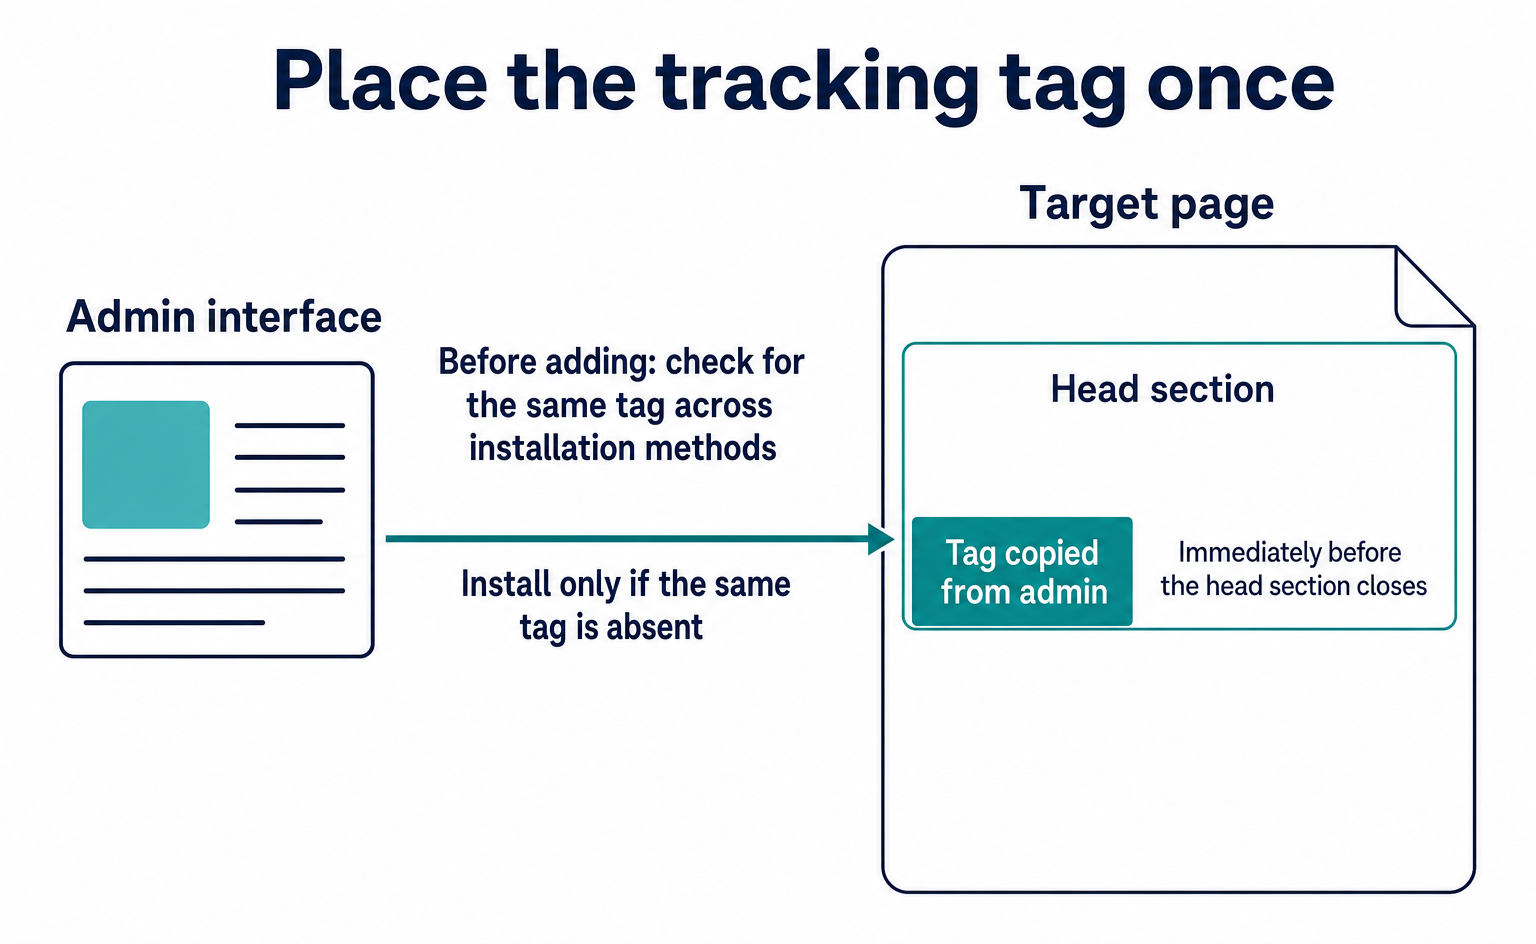
For standard HTML, place the code inside the <head> shared across pages. The <head> contains page settings and references to files to load. It is separate from the headings readers see. You can place the code immediately before </head>.
The code's async attribute tells the page not to wait for the tag to finish loading before displaying. Installation varies by the system your site uses. Check the table below.
Find the name of the tool used to build your site and read the matching row. In admin interfaces such as WordPress, look for settings named Add Code to head (head にコードを追加) or Custom Code (カスタムコード).
Screen names and available features may change with tool updates or subscription plans. If you cannot find the location in the table, check the current admin interface or the tool's guidance. Rather than editing unfamiliar files, you can send the target URLs to your web developer and ask for help.
| Tool | Where to paste the code | Details |
|---|---|---|
| Static HTML | Inside each page's <head> |
If pages include a shared header, add it there once. Otherwise, add it to every page. |
| WordPress | Immediately before </head> in the theme's header.php, or in an SEO/header-insertion plugin's Insert Code into head (head にコードを挿入) field |
Without a child theme, theme updates overwrite header.php, so using a plugin is safer. |
| Shopify | Online Store (オンラインストア) → Themes (テーマ) → Edit Code (コードを編集) → immediately before </head> in layout/theme.liquid |
Checkout screens are outside the theme, so track conversions through the completion-page settings. |
| Wix | Settings (設定) → Custom Code (カスタムコード) → add to head, and apply to All Pages (すべてのページ) | Requires a paid plan and a custom domain. |
| STUDIO / Webflow | The custom code (head) field in site settings | Both make this feature available on paid plans. |
| Next.js (App Router) | Use next/script in app/layout.tsx with strategy="afterInteractive" |
The Script component is more reliable than writing a script directly in <head>. |
| Nuxt | Add it to app.head.script in nuxt.config | Use the site-wide configuration, not useHead on individual pages. |
| Google Tag Manager (GTM) | Paste the snippet unchanged into a Custom HTML (カスタム HTML) tag and use the All Pages trigger | This works, but waiting for GTM to load can cause the first few seconds of actions to be missed. Direct installation is recommended where possible. |
| Landing-page builders and form tools | Each tool's head Tag Settings (head タグ設定) or Tracking Code (トラッキングコード) field | Each tool has its own head. Installing the tag on the main site alone will not track the landing page. |
After adding the code, publish it as well as saving it. Seeing the code in an editor preview is not the same as having it on the live page. Open the published page and follow section 5 to check that visits are recorded.
Asking a web agency or in-house engineer
You can use the following message when asking your web agency or internal developer. Include the target URLs and the actual code copied from the admin interface. Also ask them to check whether the tag is already installed through another method before starting.
Hello, we would like to introduce AgentSignal as our site tracking tool. Could you please add the following line inside the
<head>of every page, immediately before</head>? It includes async, so pages do not wait for the tag to finish loading before displaying. After adding it, please confirm that thet.jsline appears in the source of the published pages.
<script async src="https://agent-signal.ai/t.js?k=(ここに計測キー)"></script>
If you also want to measure your recruitment site, advertising pages, or forms hosted at separate addresses, list each URL. “The entire site” does not make it clear whether pages built with other tools are included. Ask the installer to include the pages covered and the publication date and time in their completion message. This makes verification easier.
5. Test whether your own visit is recorded
Open the target site once and check whether your visit appears in Recent Sessions (最近のセッション). A session is a single group of visit records. Note the time and URL so you can find it easily in the list.
- Open the tagged site once in your own browser and scroll down the page a little.
- Open the AgentSignal Dashboard (ダッシュボード). You will see the 4 summary cards from section 1, followed by the Recent Sessions (最近のセッション) list.
- If your visit appears in the list within a few minutes, installation is complete. Use the play button at the end of the row to replay a recording of the screen you just viewed.
You can also find Recent Sessions (最近のセッション) under Web Recordings & Improvements (Web録画 & 改善) → Web Recordings (Web録画) (/recordings). Human, AI agent, and bot visit records appear in the same list. Check the page visited as well as the time.
Try the interactive demo below. The article also explains each step in text.
Start with Type (種別) in the list. Then check Referrer (リファラー). A referrer indicates where a visitor came from immediately before the visit. If an address such as chatgpt.com is recorded, you can identify a visit from an AI service.
A visit without this information cannot be assumed not to have come through AI. Also, the play button is disabled for bot rows. Distinguish between having a visit record and having a playable recording.
Understanding the 3 visitor categories
Visits are shown as Human (人間) / AI Agent (AI エージェント) / bot. An AI agent is AI that operates a page at a person's request. A bot is automated traffic, such as a program that collects pages. For a visit made in your own browser, start by looking for a Human (人間) record.
Try the interactive demo below. The article also explains each step in text.
Visits classified as AI agents are eligible for recording, just like human visits. Visits classified as bots are not recorded and do not consume the recording allowance.
For visits shown as “Direct” in GA4, the source information may be unavailable. In AgentSignal too, interpret visits using the classification and source information that could be identified. Do not confuse a visit by AI with a visit by a person following a link from AI. For explanations of the categories, see AI crawlers and the role of robots.txt.
6. When data does not appear right away
If nothing appears, check whether you actually opened the target page. Just after a settings change, the old settings may remain temporarily. Before repeatedly reinstalling the code, check the table below.
| Symptom | Cause | What to do |
|---|---|---|
| The dashboard remains empty | Nobody has opened the site since the tag was installed | Open it once yourself. Tracking starts only when a visit occurs. |
| Settings changes do not appear | Tracking tag settings, such as masking scope and recording targets, are cached for up to 30 minutes | Wait 30 minutes. If urgent, also clear your browser cache and visit again. |
| Usage numbers do not increase | The recording usage display uses cached totals for up to 30 minutes | Recordings themselves are being captured. Wait, as only the display is delayed. |
| Only some pages are not tracked | The head change is missing from those page templates, such as separate templates, AMP pages, or landing-page tools | Open the source of each affected page and check for the t.js line. |
| An old page appears even after publishing | A CDN or cache plugin is serving old HTML | Purge the cache, then reopen the page in a private browsing window. |
If a visit appears in the list but usage has not changed, wait for the totals to update. If you cannot find the visit itself, check the tag location and tracking key in the next section. Identifying which display has not changed helps you avoid unnecessary reinstallation.
7. What to check when recordings are not being made
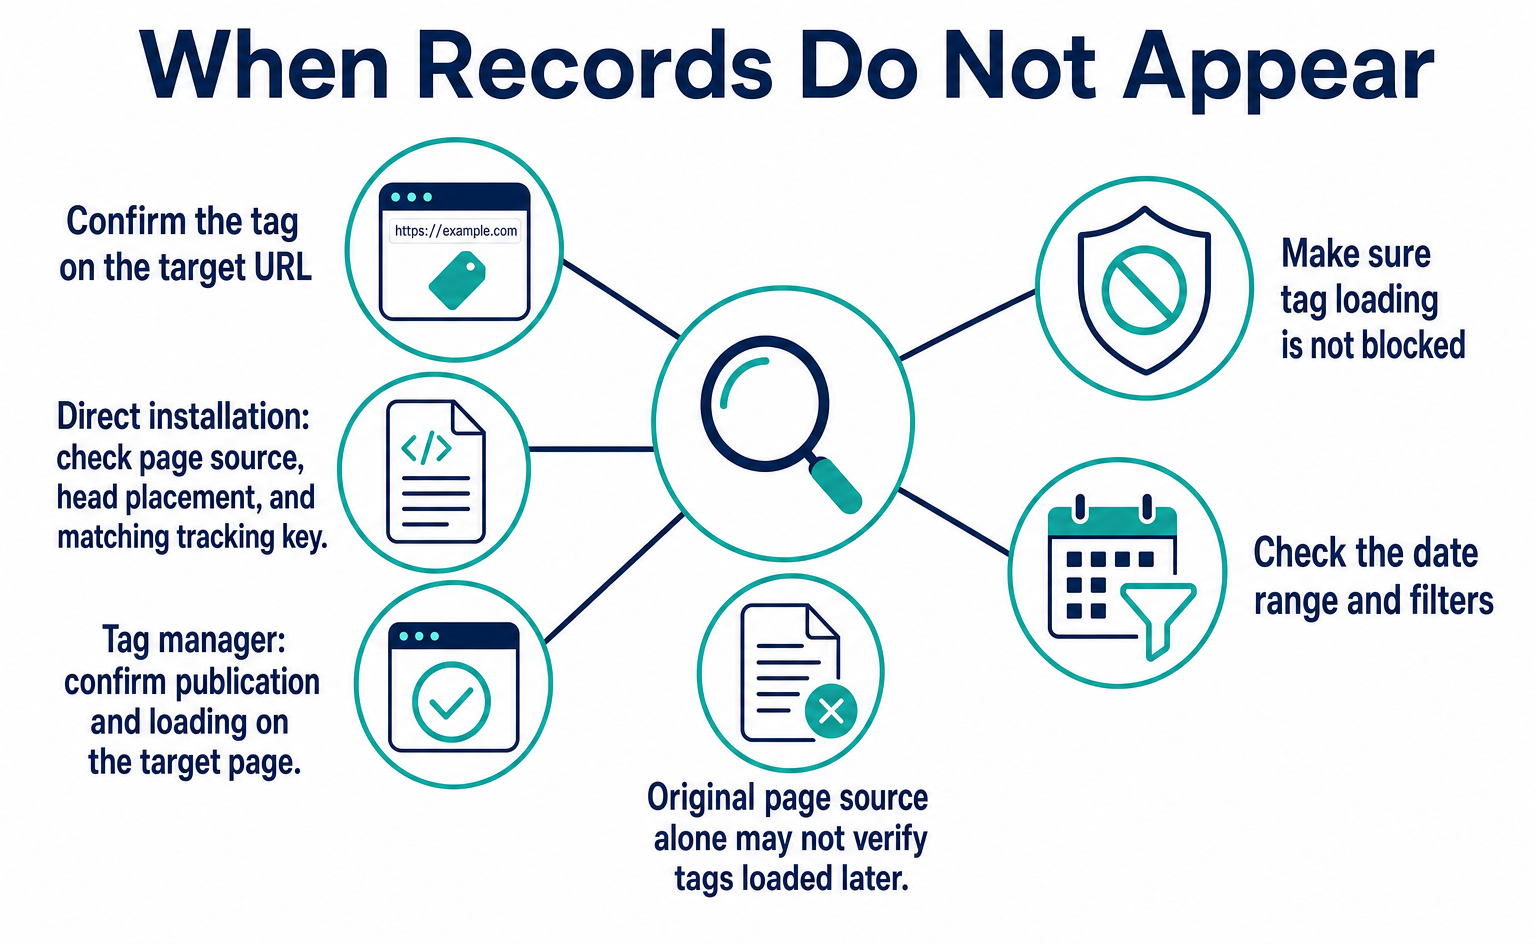
Check the tag installation, visitor classification, and remaining recording allowance, in that order. If none explains the issue, contact support with the details you checked. There is no need to assume a cause and change every setting.
7-1. Is the tag installed in the head?
Open the target page's source code and search for t.js. To view page source, use Ctrl+U on Windows or Cmd+Option+U on Mac. For direct installation, check that the line <script async src="https://agent-signal.ai/t.js?k=..."> is inside <head>.
If a tool such as GTM loads the tag later, the original source code may not be enough to verify it. Ask the installer to check that it has been published in that tool and that it loads on the target page.
Check that the tag line is still present and that the tracking key matches. Make sure a theme update or similar change has not removed the tag. Then compare the k= value in the admin interface with the value in the installed code.
Even a truncated key may produce no visible error. Do not check only the tag name; check the value too. After correcting it, open the same URL and check whether a new visit is recorded.
7-2. Was the visit classified as a bot?
Visits classified as bots have no recordings. Browsers used for automated testing, and visits through some VPNs or company network routes, may be classified as bots.
Under Web Recordings & Improvements (Web録画 & 改善) → Web Recordings (Web録画), switch the visitor type to Bot and look for the time and URL of your test. If you find a record, the issue is not “no visit.” The visit has been assigned to a category that is not recorded.
7-3. Have you exceeded the recording quota?
When the recording allowance runs out, no new recordings start. In the menu's usage display, check This Month (今月) for a paid plan or Lifetime Total (累計) for the free plan.
Deleting recordings does not restore allowance already used. If you reach a paid plan's monthly limit, wait for the next month's reset or review your plan as needed. The free plan's lifetime allowance does not reset the next month.
If the issue is still unresolved
Contact support through Ask AI (AI に質問) in the header. Include the site URL, where the tag was installed, the date and time of your test, and what you have checked so far. Rather than saying only “nothing appears,” explain whether the visit list is empty or whether only playback fails.
8. Settings for hiding personal information in recordings
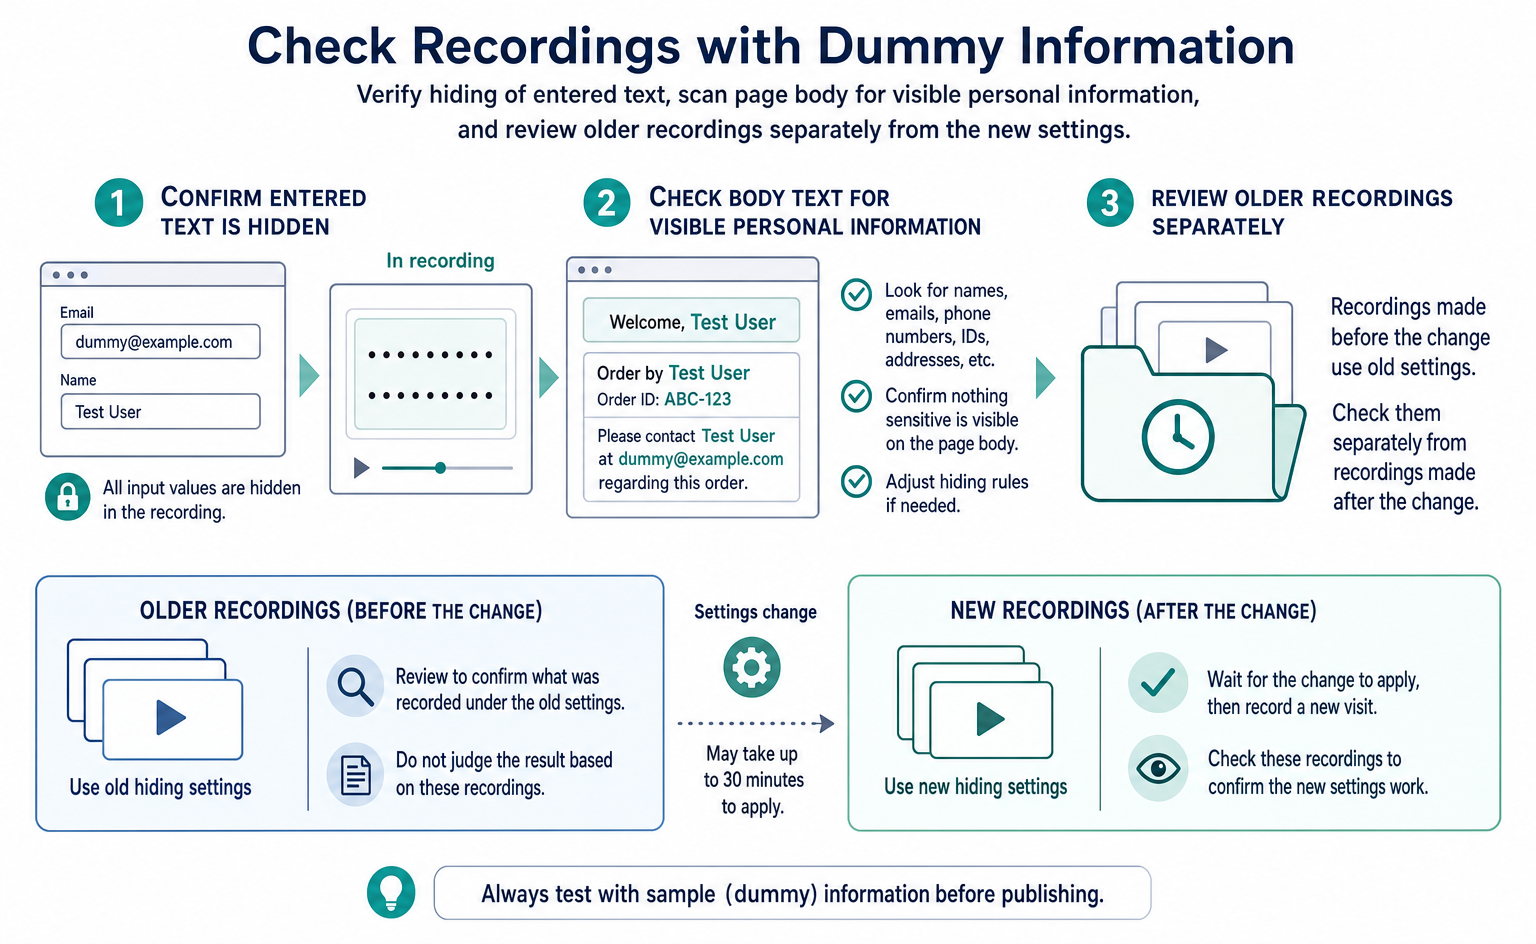
Before installation, check what will be hidden in recordings. Use Balanced (バランス), which hides form-field contents, as your starting point, and choose a level suited to the information your site handles. Hiding input fields alone may not be enough on pages that display personal information in body text.
Hiding on-screen information in a recording is called masking. Configure it under Settings (設定) → Privacy (プライバシー) (/settings/privacy). Check what appears in form fields and member pages beforehand, rather than deciding after installation.
| Level | What is masked | Suitable sites |
|---|---|---|
| Basic (ベーシック) | Password fields only | Corporate sites and media sites with almost no input forms |
| Balanced (バランス), recommended | All input fields | General sites with inquiries, member registration, or e-commerce |
| Strict (ストリクト) | All input fields plus body text | Member-only pages, medical appointment pages, and other sites where the on-screen text itself contains personal information |
Passwords are never recorded in readable form at any level. You can also specify individual areas to hide, such as fields displaying names. You identify these areas using a “selector,” a description that points to a location on a page. If you are unsure how to do this, tell your web developer which areas you want hidden.
For pages handling card numbers or medical information, use Strict (ストリクト) or exclude them from recording. Whatever setting you choose, test with sample information before publishing and check that all necessary areas are hidden.
Changes can take up to 30 minutes to apply. Do not judge the result only from a page opened immediately after the change. Wait for it to apply and record a new visit. Check earlier recordings separately from recordings made under the new settings.
9. Record purchases, inquiries, and other actions
Once basic tracking works, you can choose additional tags to record submissions or specific actions. Settings (設定) → Tracking Tag (計測タグ) offers 3 additional tags. All require the basic t.js tag to be installed first.
| Additional tag | What it does | How to use it |
|---|---|---|
| CV tag | Records completed purchases, registrations, and similar actions as conversions. From the CV (/cvs) list, you can play recording clips from before and after a conversion. | Call window.AgentSignal.cv('event name') on the completion page or when submission completes. |
| Custom event tag | Records any action, such as selecting a product or playing a video, without counting it as a conversion. In Extract Recording Around Event (イベント前後の録画を抽出), specify the number of seconds before and after the event to play a clip of just that period. | Send an event when the action you want to record occurs. |
| identify tag | Pass the logged-in user's user_id to link visits from different devices to the same user. In Users (ユーザー) (/users), you can follow multiple sessions together. | Pass the user_id on a page after login. |
Use the CV tag if you want to follow visits through to a completed submission. CV means a conversion: an action counted as a result, such as a purchase or registration. Add the following one-line call to a submission completion page or similar location. Make sure that merely opening the input form does not count as a completed submission.
<!-- 申し込み完了ページなど、CV とみなすページで 1 回呼ぶ -->
<script>
  window.AgentSignal && window.AgentSignal.cv('signup');
</script>
Combining conversion records with recordings lets you review the actions from arrival through submission. First, complete the process yourself and check that the conversion is recorded at the intended moment. Evaluate successful recording separately from that route's effect on sales.
For what to measure, see What is LLMO?. For related terminology, see The differences between LLMO, GEO, AEO, and AIO.
10. Common questions about installing the tag
After installation, you can still check what is recorded and your plan's limits. Placing the tag alone does not change your subscription. See the table below for questions about loading speed, input values, and other concerns.
| Concern | Answer |
|---|---|
| Will page loading slow down? | The tag includes async, so the page does not wait for the tag to finish loading before displaying. Check your actual pages after installation too. |
| Will personal information be recorded? | Input values are masked by default. You can choose from the 3 levels described in section 8. |
| We want multiple teams to view the same site | Tags belong to individual teams. The right approach is to invite members to one team and share the same view. You do not need to place 2 tags on the site. |
| Will installing it alone trigger a charge? | No. It operates within your plan's limits. When you reach the limit, new recordings simply stop. |
| Will removing the tag delete the data? | No. Recordings remain for your plan's retention period of 30–365 days and are automatically deleted as that period expires. |
| Can I install it in a development environment, such as localhost or staging? | Yes. However, internal test visits count toward usage and consume the free plan's lifetime allowance. Installing it only in production, or removing it from staging, is the safer choice. |
11. Requests and handovers for your web team
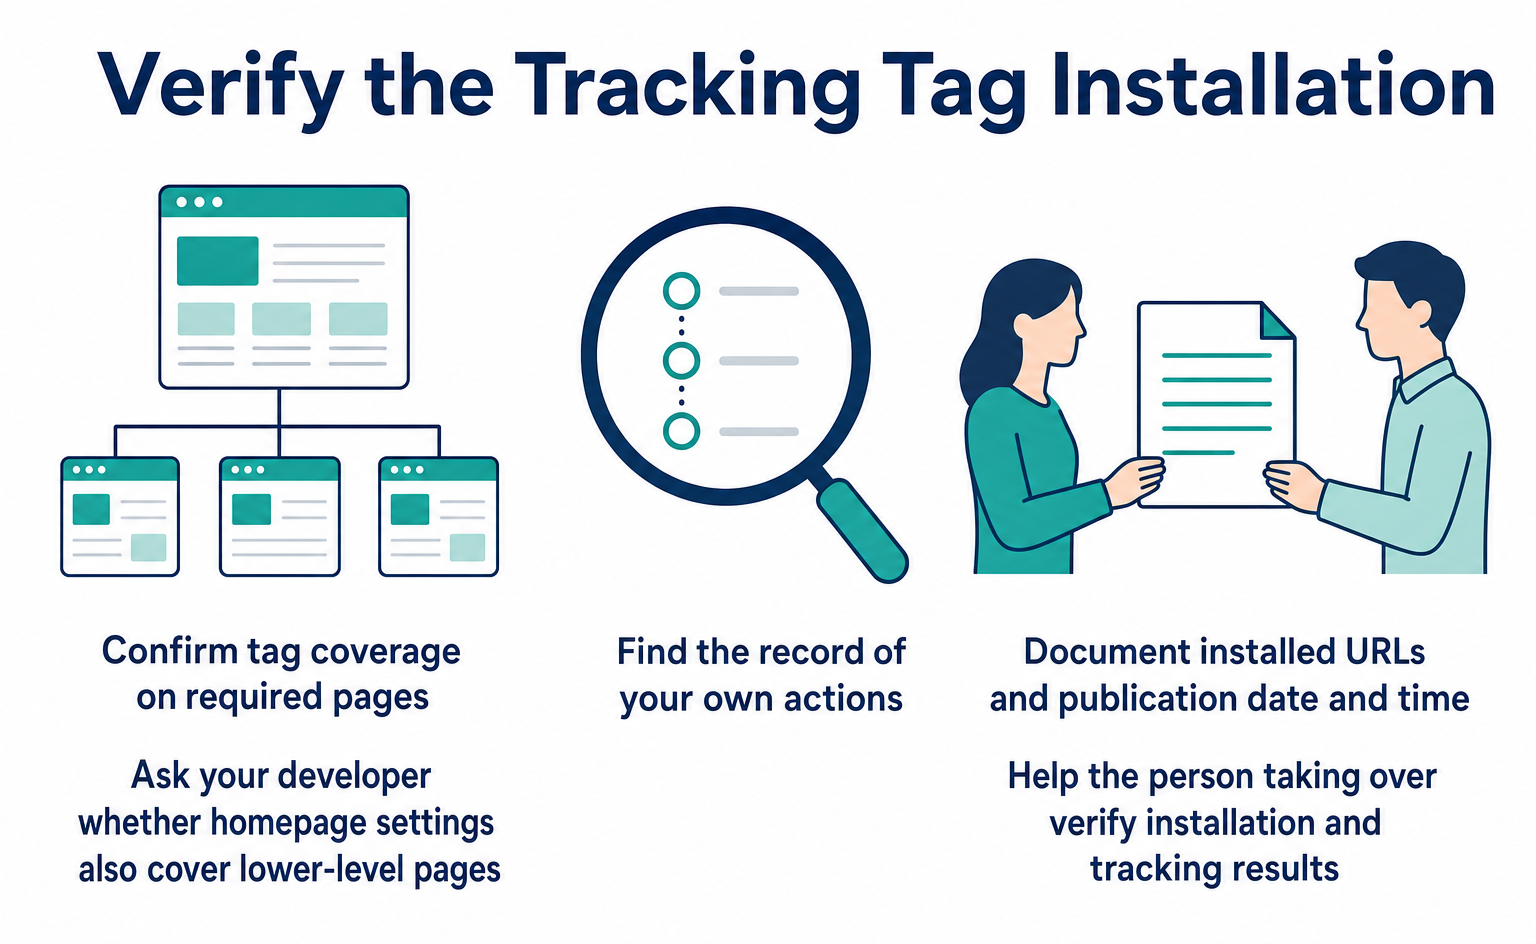
Sharing the installed URLs and publication date and time allows someone else to verify the tracking results. Do not stop at a message saying “the tag is installed.” Keep a record of where it was installed.
Agree on the scope before making the request
Your official company site, recruitment site, advertising pages, and application forms may be built with different tools. Open the pages you want to measure and list their URLs.
Whether installing the tag on the homepage is enough depends on how the site is built. Ask your web developer to check whether the same settings also apply to lower-level pages. If particular pages matter, such as product or completion pages, name them too.
Also decide which team should receive the records. If you switch between teams in the admin interface, include the team name associated with the copied tag in your request. This ensures the installation matches the team that will review the records.
What to include in the completion message
- The site where the tag was installed and the URLs of pages to use for verification.
- The installation method: directly added or installed through a tool such as GTM.
- The publication date and time.
- The team name used for tracking.
- The pages the installer opened and checked.
- Pages where the tag is not yet installed or where separate work is needed.
Even if some pages are excluded, they can be addressed later if the reason is clear. Before writing “installed on all pages,” check whether that includes separate form tools and advertising pages.
What the person verifying installation should do
Open the shared URLs and note the time. Scroll a little, then find the same time and URL in AgentSignal's visit list. Do not mistake a visit from another day for the result of this test.
If a recording is available, check that it plays. If masking is set for input fields or parts of the body text, check that the test information is hidden. There is no need to test with real personal information.
If the visit is missing, send the URL and test time back to the installer. This helps narrow the check to the affected page instead of redoing every setting from the beginning.
When pages change after installation
After changing a theme or moving an advertising page to another tool, check that the tag is still present. A record of an earlier installation does not prove that the tag exists on the moved page.
Use the same verification procedure. Open the published URL and check that the new visit is recorded. If tracking stops when the design changes, you can also identify which pages stopped producing records.
Add extra tags after deciding which actions matter
You do not need to install every additional tag to start basic tracking. First check visits and recordings. Then choose the actions you want to understand, such as submissions or video playback.
If you want to count submissions, decide what counts as completion. Clicking the submit button and completing a submission without validation errors mean different things. Tell the installer exactly when to record the action.
The identify tag, which groups visits from logged-in users, serves a different purpose from the basic tag. Consider it when you need to use an ID to distinguish members. You do not need to configure it first if you only want to measure ordinary page views.
Summary
After installing the tag, open a published page and check that your visit is recorded. Treat adding the code and verifying that it works as one complete task.
- Get the tracking tag from Settings (設定) → Tracking Tag (計測タグ) (/settings/tag), and paste the same snippet into the
<head>of every site you want to measure. One tag automatically distinguishes multiple sites. - The installation location depends on the tool you use. Check the table in section 4. If you cannot edit the site yourself, send the request template as provided.
- After installation, tracking and recording start without further actions in the admin interface. Visitors are automatically classified as Human (人間), AI Agent (AI エージェント), or bot. Bots are not recorded and do not consume the recording quota.
- Verify installation by finding your visit in Recent Sessions (最近のセッション) on the dashboard. Settings changes are cached for up to 30 minutes, so wait if they do not appear immediately.
- If recording does not work, check in this order: tag missing from the head → bot classification → quota exceeded. A mistyped key can stop tracking silently, without an error.
- The only setting to decide before installation is the masking level. Next, use the CV tag to view recording clips showing how visitors arriving through AI proceed to a completed submission.
FAQ
- Q. How soon will data appear after I install the tag?
- Visits appear within a few minutes. Start by opening the site yourself to check. If you change tag settings, such as which information to hide, the changes can take up to 30 minutes to apply.
- Q. I run multiple sites. Do I need a separate tag for each site?
- No. Paste the same code inside each site's <head>. Each site is registered automatically when it receives a visit.
- Q. Are passwords and other information entered into forms recorded?
- Passwords are not recorded in a readable form. You can choose how much to hide in other fields under Settings (設定) → Privacy (プライバシー). Before publishing, enter dummy information and check the recording.
- Q. Do bot visits use the recording allowance?
- Visits classified as bots are not recorded and do not use the recording allowance. AI that operates on a person's behalf is eligible for recording. However, it must meet the recording conditions, including having the tag run.
- Q. If I remove the tag, will existing recordings and data be deleted?
- Removing the tag alone does not delete them. Recordings remain for your plan's retention period of 30–365 days. Deleting recordings does not restore the allowance already used.
- Q. Can I install the tag through Google Tag Manager (GTM)?
- Yes. Paste the code into a Custom HTML (カスタム HTML) tag in GTM, set it to run on all pages, and publish it. If GTM loads slowly, the first few seconds may not be recorded.
- Q. Will the tag slow down page loading?
- The tag includes async, so the page can display without waiting for the tag to finish loading. This does not mean it adds no processing at all. Check loading speed on your actual pages after installation.
- Q. Is it safe for other people to see the tracking key, the value after k=?
- The tracking key specifies which team receives the records. It is intended to be visible in page code, and the key alone cannot be used to log in to the admin interface. Treat it separately from secret login credentials.
Sources
- [1] AgentSignal 使い方ガイド (計測タグ) (AgentSignal) — accessed 2026-09
- [2] Overview of OpenAI crawlers (OpenAI) — accessed 2026-09
- [3] AI features and your website (Google Search Central) — accessed 2026-09
About the author
Shogo MizushimaCEO of kairos Inc. / AgentSignal Developer
Develops AgentSignal, a tool for measuring AI crawler visits and AI-referred traffic, and diagnosing AIO readiness. Writes about measurement and practical improvements for AI search using observed data.
Related articles
Measurement and site improvement
What Are AI Crawlers? Why Blocking GPTBot Doesn’t Remove You from ChatGPT Search
AI crawlers are programs AI companies use to read public web pages. Learn how GPTBot differs from OAI-SearchBot, how Google-Extended works, why visits can continue after a robots.txt block and how to choose settings by purpose.
Published
AIO and AI search
What Is LLMO? How It Differs from SEO and Why Some Say It Is Pointless
LLMO is the work of helping answers from ChatGPT and other AI find and accurately describe your company. Learn how it differs from SEO, why some call it pointless, how E-E-A-T relates, how to measure results and what to do in the first month.
Published
AIO and AI search
LLMO, GEO, AEO and AIO: Understanding AI Optimization Terms
LLMO, GEO, AEO and AIO are names for work that helps AI answers find your company. Learn what GEO and AEO mean, how GEO differs from local map optimization, where the terms overlap, and how to compare proposals that use different names.
Published