How to List Products on Google for Free: Merchant Center Setup
A guide for online retailers shipping within Japan, from preparing Merchant Center and adding products with Google Sheets to setting shipping fees and checking free listings. Learn the first-time setup requirements and how to keep prices and stock up to date.
You want customers to find your products on Google, but you are not ready to spend money on advertising. Google Merchant Center’s free listings are worth exploring. They let you send product names, images, prices and other details to Google so it can feature your products in Search, Shopping and elsewhere.[1]
Merchant Center is where you register and manage your store’s product information on Google. “Free” describes the listing program; it does not guarantee that your products will appear. The goal is to bring customers from a displayed product to its page on your store’s website.[1]
This article is for online retailers that ship products within Japan. It covers preparation, adding products with Google Sheets and checking the results. The information was checked on September 12, 2026. This is separate from applying to accept orders within Google’s AI interfaces.
First, understand how product information reaches Google
We will use a fictional store selling a white mug for ¥3,300, including tax. We assume its public product page has a photo, price, stock information and a purchase button, and that customers can actually place an order.
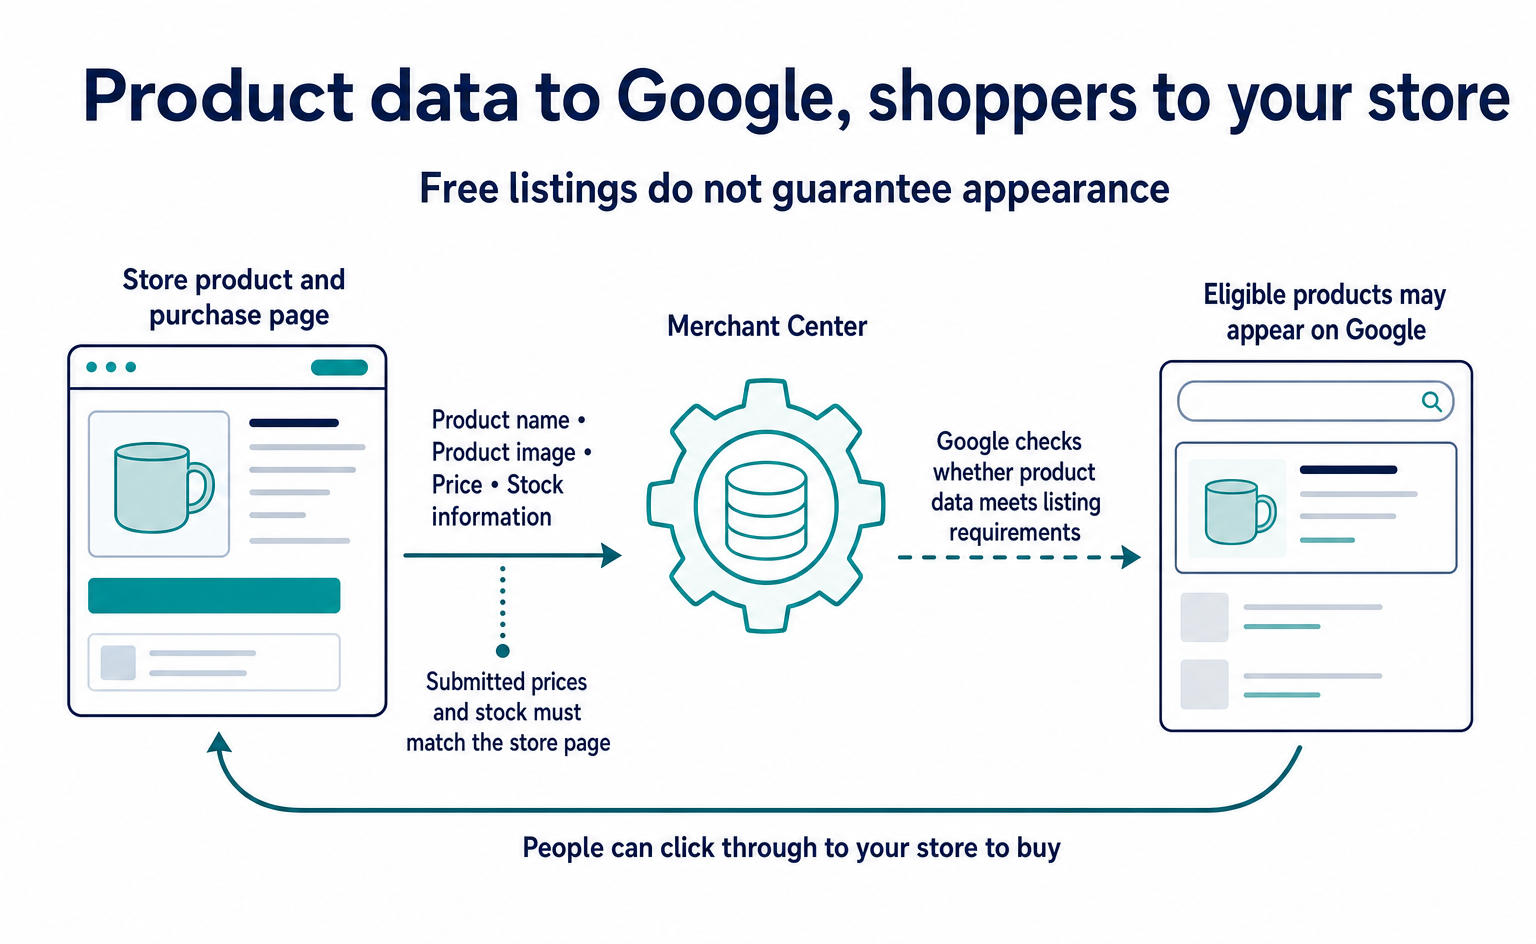
When you send that information through Merchant Center, Google receives it as product data and checks whether it meets the listing requirements. Product data is information organized into fields, such as product name and price.[1][2]
The product list you send to Google is sometimes called a “product feed.” Think of it as a table for submitting consistent sales information, rather than special advertising copy.
In addition to letting Google read your product pages, Merchant Center lets you manage and submit product information yourself. However, problems arise if the submitted prices or stock information differ from your product pages. Do not simply make the submission table look appealing. It must reflect the same terms of sale.[2][3]
1. Prepare your store information and the access needed to make changes
First, sign in to Merchant Center with the Google account you use for work. If this is your first time, you can start creating an account from Google’s Merchant Center information page.
Check first whether your company or the person managing the store has already registered. Creating another account for the same store can make it unclear where products and the website are managed.
Prepare your store’s official details, online store address, product information, and shipping and return terms. Do not confuse the address of an individual product page with the address of the store itself. During account setup, you will verify that you can manage the store’s website.[4]
If Google can already confirm your management access, website verification may happen automatically. Otherwise, follow one of the methods shown on screen. Some methods, such as uploading a file, require help from someone who can change the website.[4]
“Verified” (確認済み) means your ability to manage the website has been confirmed. “Claim” (申請) links that website to your Merchant Center account. If an error says another account already uses the website, check with its administrator or review the existing registration. Do not try to solve the problem by repeatedly creating new accounts.[4]
At this stage, the goal is to make your website available to manage through this account. Product review comes later.
2. Choose how to add products
Merchant Center offers several ways to add products, including connecting your existing e-commerce service, uploading a file and using Google Sheets. Google Sheets is Google’s service for editing spreadsheets online.[2]
If your store already synchronizes products through a supported e-commerce service such as Shopify, check that connection. Before you start managing the same products in a separate spreadsheet, find out which information is already being sent to Google. This helps prevent conflicting updates.[2]
This article uses a spreadsheet to manage the product list. It is intended for stores that want to start with a small number of products and learn what information is required as they register them. As your product range or update frequency grows, consider whether your existing e-commerce service can send the information automatically.
Do not assume you can enter products one by one manually for your first registration. The official help checked on September 12, 2026 states that this method is for accounts that already have products. For your first products, it directs you to use a file, Google Sheets or an API. An API connects systems so they can send product information to each other.[5]
Choose a method available from the start. That way, if you cannot find a manual entry form, you will not automatically assume you made a setup mistake.
3. Enter your products in Google’s template
In Merchant Center, open “Products” (商品) under “Products and store” (商品とショップ). Under “All products” (すべての商品), select “Add products” (商品を追加), then choose “Add another product source” (別の商品ソースを追加) from the menu. A product source is the place Google reads your product information from.[2][6]
Select “Use Google Sheets” (Googleスプレッドシートを使用), then open the template with “Use template” (テンプレートを使用). Keep the template’s column headings and replace the instructions and sample rows with your own products. The official help says to delete the instructions and examples in rows 2–5. Check the actual template before making changes.[6]
For the mug, you would prepare information like the following. This is an excerpt to explain the fields, not a complete table that meets every requirement for every product.[3]
| Field | Fictional example | What to use for your store |
|---|---|---|
id |
MUG-WH-01 | A fixed product number that uniquely identifies the item |
title |
White ceramic mug, 300 ml | The actual name, capacity and other details that identify the product |
link |
Your store’s mug product page | The address of the page where customers can actually buy the product |
image_link |
Your store’s mug image | The address of an image showing that product |
price |
3300 JPY | The current selling price and currency |
availability |
in_stock | The current availability; in this example, the item is in stock |
Other information, such as a manufacturer-assigned product identifier or brand, may be required depending on the product type and circumstances. If you are asked for a product identifier such as a JAN code, check the actual number. Do not invent numbers because you do not know the correct one.[3]
If the white and blue versions of the same mug have different stock levels, manage the information so it is clear which version it describes. Do not combine the white mug’s image with the blue mug’s stock information just because their product names are the same.
After entering the data, return to Merchant Center, check the schedule for reading the spreadsheet and select “Continue” (続行). The official guide gives a default synchronization interval of 24 hours. Do not assume all listing information has updated as soon as you save the spreadsheet. Check what Google has imported.[6]
4. Match shipping and return terms to your actual terms of sale
For free listings of products shipped to Japan, you must configure shipping costs or add shipping costs to the product data. If shipping costs extra on top of the ¥3,300 product price, accurately communicate what the customer must pay.[1]
To set shipping terms for the whole account, open Google’s shipping settings guide and enter your delivery destinations, delivery times and shipping costs. If terms differ by destination country or region, do not set free shipping across the board.[7]
For example, if your store offers free shipping on orders above a certain amount, check whether one mug qualifies. If remote islands or other locations incur extra charges, reflect your store’s actual rules. These are examples of what to check; they do not assign a particular shipping fee to the fictional store.
Publish your return terms on your store’s website as well. The official free listings help directs you to publish a return policy on your website and register it in Merchant Center.[1]
If a product description only says “returns accepted,” check the conditions against your store’s actual practices. Do not create new promises just to fill in Google’s fields. Accurately submit the terms you explain to customers.
5. Check the registration results and free listing status
After submitting the products, find the mug in the “Products” (商品) list and check its status. The status indicates whether the product is still being processed, has an issue or is in another state.[6]
If there is a problem, open the reason through a notice such as “Needs attention.” The Japanese label is “要対応.” Address the issue shown, such as missing product information, a price mismatch or an image problem. Each issue provides guidance on how to fix it.[6]
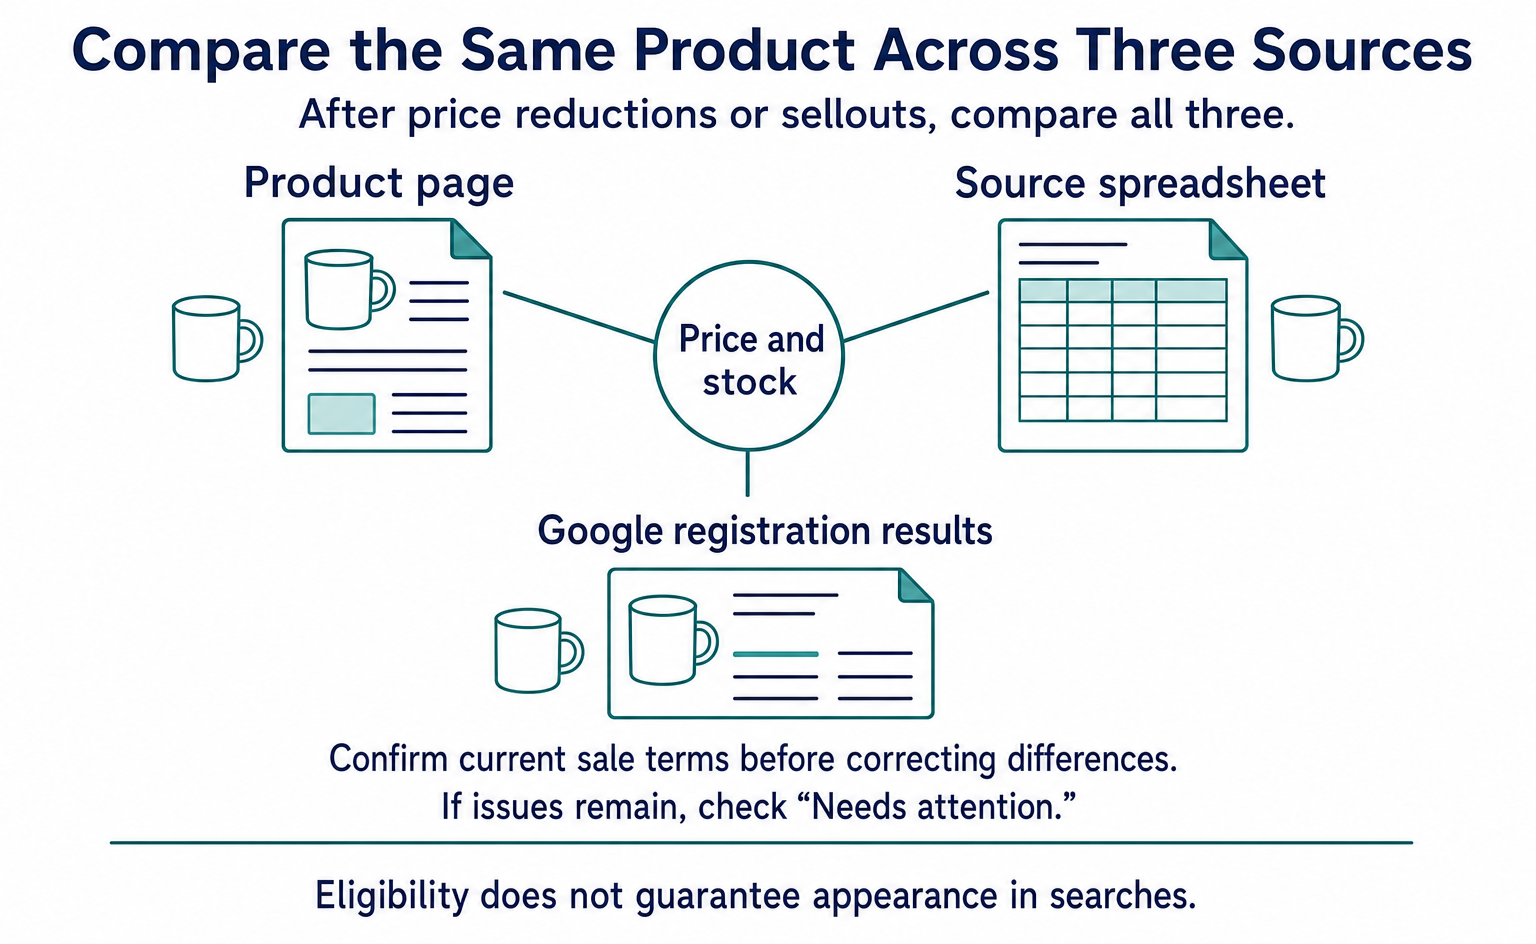
For example, if Google flags a price mismatch, compare the product’s public page with the spreadsheet you submitted. If the store shows ¥3,300 but the spreadsheet has an old price, confirm the current terms of sale and correct the information. Do not change either value arbitrarily just to clear the warning.
To check free listing settings, go to “Marketing” (マーケティング) on the left, then “Marketing methods” (マーケティング方法), and look at the “Free listings” (無料リスティング) card. You need administrator access to change these settings.[1]
Having free listings enabled is not the same as a guarantee that your products will appear in actual searches. Even after a product becomes eligible, Google decides which searches it will appear for.[1]
Keep updating the spreadsheet after sellouts and price reductions
If you use a spreadsheet as your product source, make updating it part of your regular work. If you lower a price on the store’s product page but leave the old price in the spreadsheet, you will keep sending outdated information to Google.[2][6]
If the mug sells out, check its availability and update the stock information in the source. When it is restocked, update it using the same product number rather than repeatedly adding it as a new product. Google’s product data specification also directs you to keep the same product ID when making updates.[3]
After registration, check more than whether the spreadsheet was saved. Review what Google imported and any issues that remain with the products. Make it clear in your store’s workflow which spreadsheet needs updating and who is responsible, so updates continue even when staff change.
If you also want to accept orders within Google’s AI interfaces, your next step is to check the eligibility requirements and prepare the connection. See the UCP application guide for selling products through Google’s AI for details. You can proceed in stages: first send accurate product information, then expand where you accept orders.
FAQ
- Q. Will my products definitely appear once I register them?
- Registration does not guarantee display. Even after products become eligible for free listings, Google decides whether to show them based on the search.[1]
- Q. Can I enter my very first product manually?
- The official help available on the date checked says manual entry is for accounts that already have products. For your first products, it directs you to use a file, Google Sheets or an API.[5]
Sources
- [1] 商品の無料リスティング (Google) — accessed 2026-09-12
- [2] 商品をアップロードする方法 (Google) — accessed 2026-09-12
- [3] 商品データ仕様 (Google) — accessed 2026-09-12
- [4] オンラインショップのURLの確認について (Google) — accessed 2026-09-12
- [5] 商品エディタで商品を追加する (Google) — accessed 2026-09-12
- [6] Add products using Google Sheets (Google) — accessed 2026-09-12
- [7] 送料の設定 (Google) — accessed 2026-09-12
About the author
Shogo MizushimaCEO of kairos Inc. / AgentSignal Developer
Develops AgentSignal, a tool for measuring AI crawler visits and AI-referred traffic, and diagnosing AIO readiness. Writes about measurement and practical improvements for AI search using observed data.
Related articles

AI shopping and booking
51% of US consumers use AI shopping tools. How much has product selection changed?
That does not mean AI placed 51% of orders. It is the share of US consumers who reported using at least one AI-powered shopping tool during the past month.
Published

AI shopping and booking
Same AI, different doors: why Amazon blocked Muse while Shopify offers a connection
Amazon has reportedly blocked Meta's AI agent, Muse. Meanwhile, Shop's official help lists Muse as an example of a supported AI platform.
Published

AI shopping and booking
From about $1K to over $100K a month: What did an overseas brand write to grow sales from AI search?
GR0 reports that a beauty and wellness brand's monthly sales through AI answers grew from about $1,000 to over $100,000 within months. The brand chose article topics based on AI prompt data. Here is the case in brief, plus three steps to check your own product pages.
Published